Progression Guide
Progression Guide for Crystal of Atlan
Last updated: 10/6/2025

PROGRESSION GUIDE
LEVEL 1-55
CHARACTER ENERGY
Starting from Chapter 2, all subsequent Chapters are time-gated and
can only be progressed one chapter per day. To make the most of your
Character Energy, prioritize completing the Main Quest first, then
use any remaining energy for the Elite version of the chapter.
The timegate is based on character's creation, therefore player can create
alt early and avoid timegate later on.
Avoid using Batteries early on — they're more valuable later in the endgame
when energy needs become more demanding.
GEAR CRAFTING & ENHANCING
Avoid crafting or enhancing gear at this stage. Equipment obtained
from drops and one-time rewards is more than sufficient to clear the
main story. Since players will frequently replace their gear, early
investments aren't worth the resources.
Throughout the main quest, players will receive plenty of +12 Voucher
Tickets as rewards. It's best to save these until you reach level 55,
when gear upgrades become more meaningful.
LEVEL 55-60
ACCOUNT ENERGY
Players should reach level 60 around day 4. If possible, using some
Battery to hit level 60 earlier is recommended. Reaching level 60
increases the Account Energy cap to 840, allowing for more
activities each day.
Account Energy functions similarly to Character Energy—it refreshes daily.
Any unused Account Energy is converted into Reserve Account Energy, which
acts as a double drop system. When combined with a Double Potion, players
can earn triple rewards per run, significantly saving time.
However, Account Energy can only be used to obtain Account-based loot,
which is generally less valuable. It's best used for farming the Elite
stages and Abyss in Chapter 5 to unlock Weekly Conquest—one the core
of endgame farming. Account Energy can also be used to farm daily Epic
Shards, up to a limit of 435.

VOID SET
Upon reaching level 55, players are advised to craft Void Set gear
to obtain Nullification stats, which are a hard requirement for
endgame content. At this stage, players can use the +12 Armor
Vouchers for levels 35, 45, and 55 on Rare Armor of the
corresponding level. These enhanced pieces can then be inherited
into the Void Set gear.
It's recommended to save the Level 60 +12 Vouchers for later use.
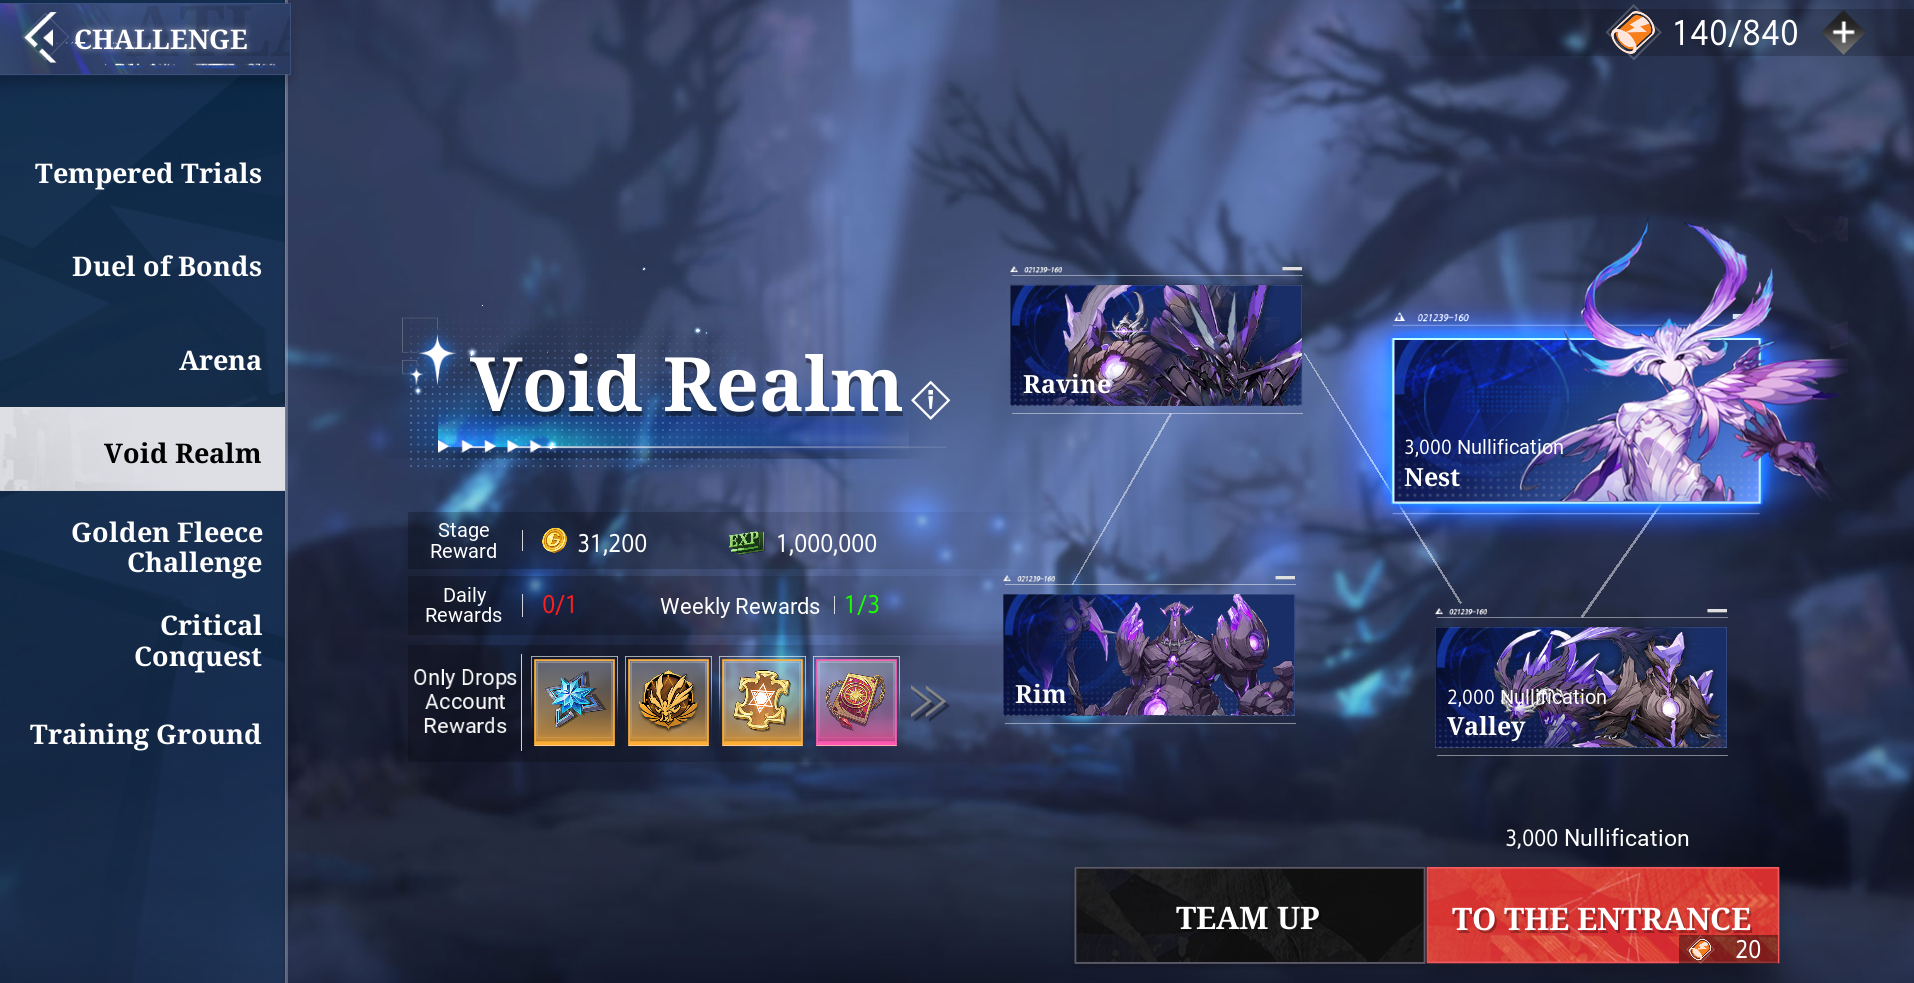
VOID REALM
VOID - RIM
This stage drops Zeroing Engraving, a material used to craft Void Set Accessories, with a daily drop limit of 18. In most cases, players only need to run this stage once or twice to collect enough materials for all three Void Set Accessories.
VOID - RAVINE
This stage drops Hyper Engraving, a material used to craft Void Gear, with a daily drop limit of 48. Generally, running this stage once is enough. To conserve Energy, it's recommended that players purchase the remaining Hyper Engravings from the Trading House instead.
VOID - VALLEY
This stage requires 2,000 Nullification, which becomes accessible
once players equip a full Void Set. It drops Level 55 Epic Shards,
Ultra Engraving, and Level 55 Epic Gear.
Ultra Engraving is used to upgrade Void Gear into Level
55 Epic versions (up to 6 drops daily).
Level 55 Epic Shards are used to craft Epic Gear at
this level.
This stage will be the primary farming spot until players obtain a full
set of Level 55 Epic Gear. It's recommended to equip any randomly dropped
Epic Gear to increase Nullification, even if it's not class-specific,
and replace it later with class sets.
Once a full Level 55 Epic Gear set is completed, players can stop farming
this stage.
VOID - NEST
This stage requires 3,000 Nullification, which becomes accessible
fairly quickly as players collect more Level 55 Epic Gear. It can
only be cleared 3 times per week.
Rewards include up to 3 Origin Engravings, used to
craft Void Talisman and Relic, and guarantees at least one Level 55
Epic Gear per run. Due to its valuable rewards, this is the highest
priority for Character Energy usage each week.
Players are strongly advised to complete the subportals within the dungeon,
as they significantly reduce the difficulty and help avoid wipes.
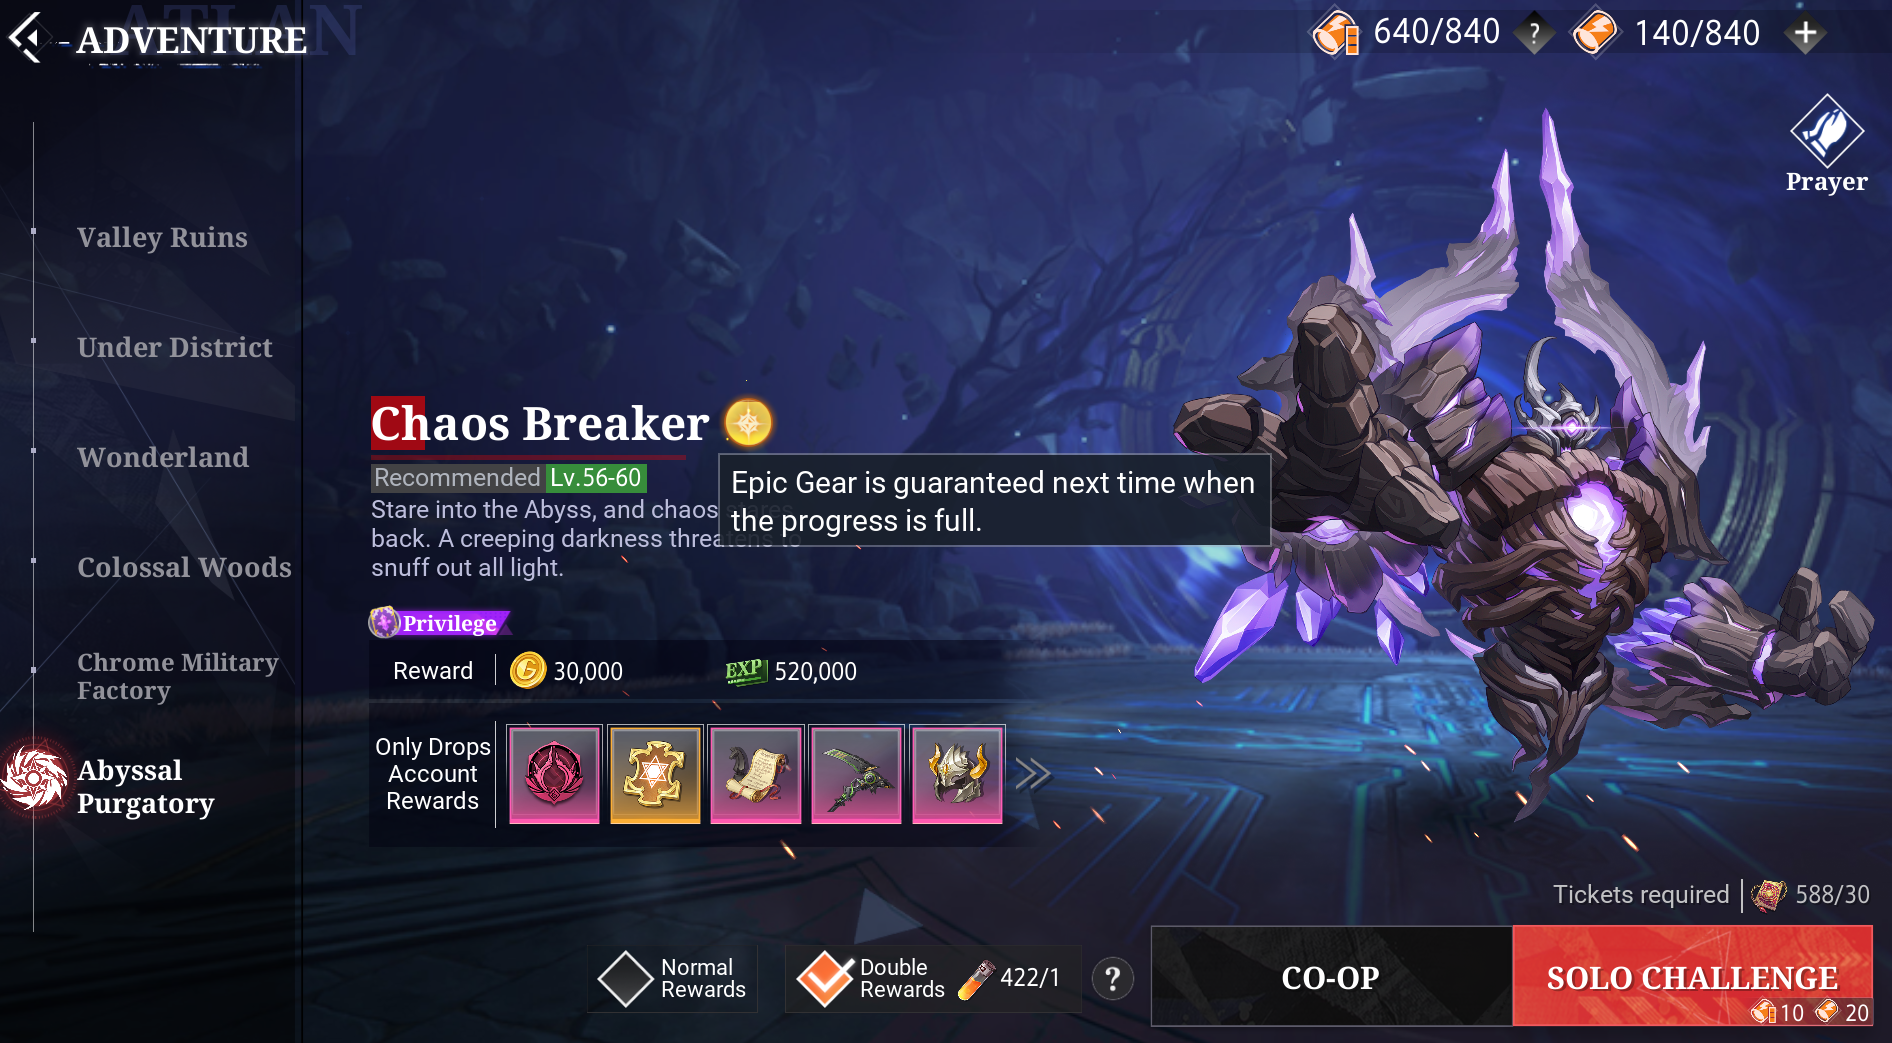
ABYSS PURGATORY
EPIC GEAR PITY
Upon reaching Level 60, this challenge becomes available and
features a pity system: after 15 runs using Character Energy,
players are guaranteed a Level 55 Epic Gear drop.
Only Character Energy counts toward pity progression and is required
for Epic Gear drops.
Double Potion accelerates pity progression by counting each run as two,
but does not double the guaranteed gear drop.
Obtaining an Epic Gear drop before 15 runs will reset the pity counter.
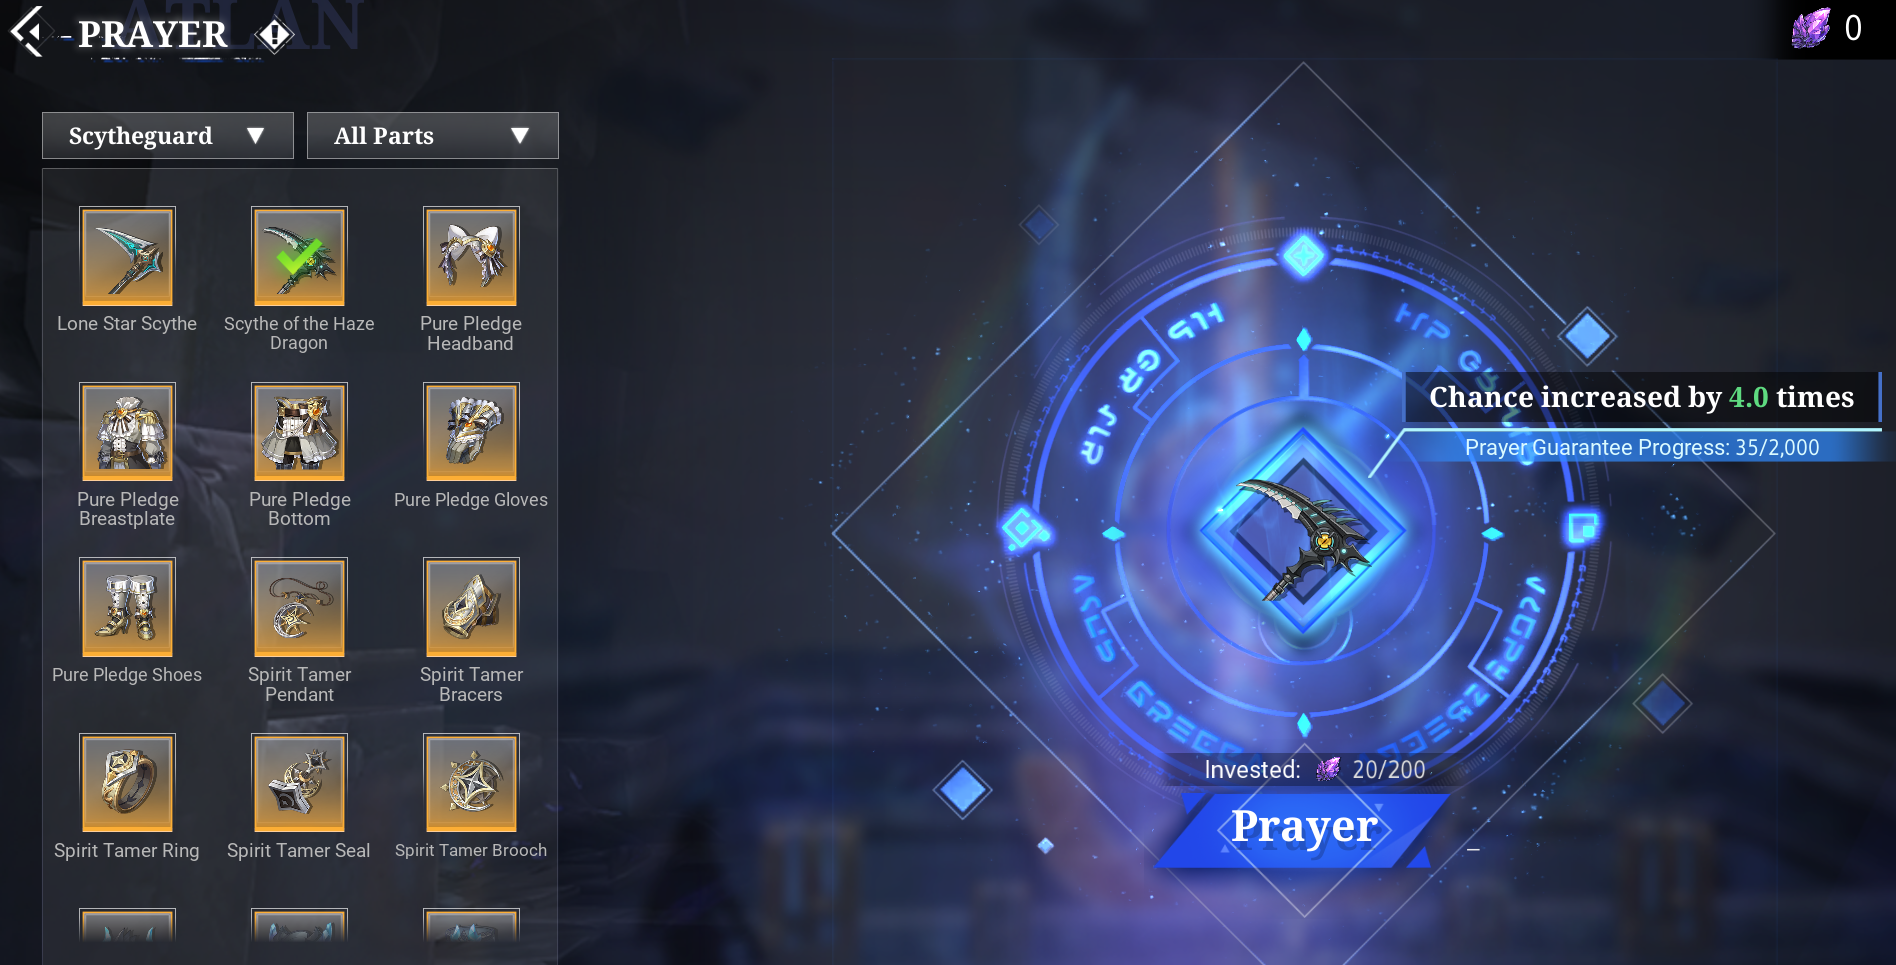
PRAYER
Purgatory features a Prayer System, allowing players to select a
specific gear type for an increased drop rate and hard pity. This
system requires an item called Abyss Desirium, which can be
purchased for 80,000 Gold from the NPC store or up to 60,000 Gold
from the Trading House (requires Shareable Gold).
It’s recommended to invest 5 to 10 Desirium initially to activate the
feature. Each Desirium increases the drop rate by 0.2x.
The amount of Desirium required for hard pity varies by gear type, with
Weapons being the most expensive. Players can freely change their selected
prayer target, and pity progress is tracked separately for each gear
type.
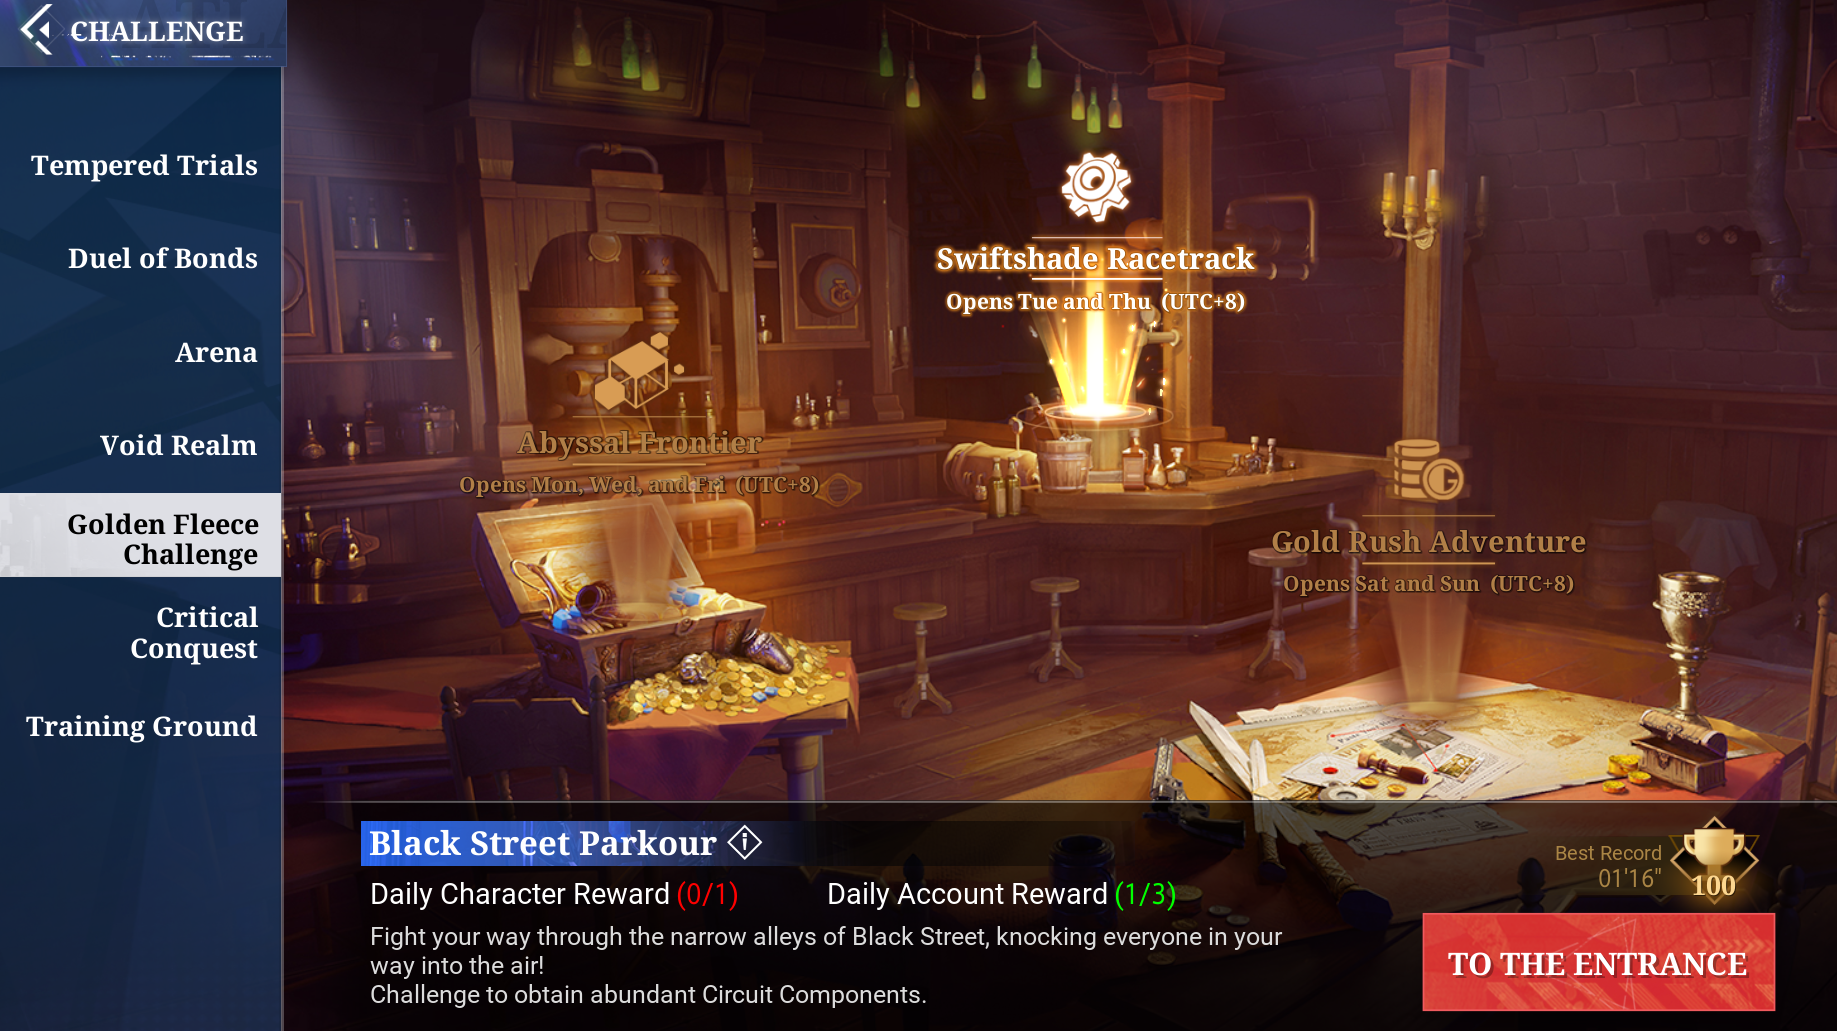
GOLDEN FLEECE
At Level 55, players unlock the Golden Fleece Challenge, which
offers three different rewards depending on the day of the week.
Rewards can be claimed three times per account and once per
character, making it highly beneficial to have three characters at
Level 55 to maximize gains.
The number of rewards earned depends on player performance—the better
the performance, the greater the rewards.
| DAY | REWARD |
|---|---|
| Monday, Wednesday, Friday | Hunting Permit |
| Tuesday, Thursday | Circuit Components |
| Saturday, Sunday | Bound Gold |
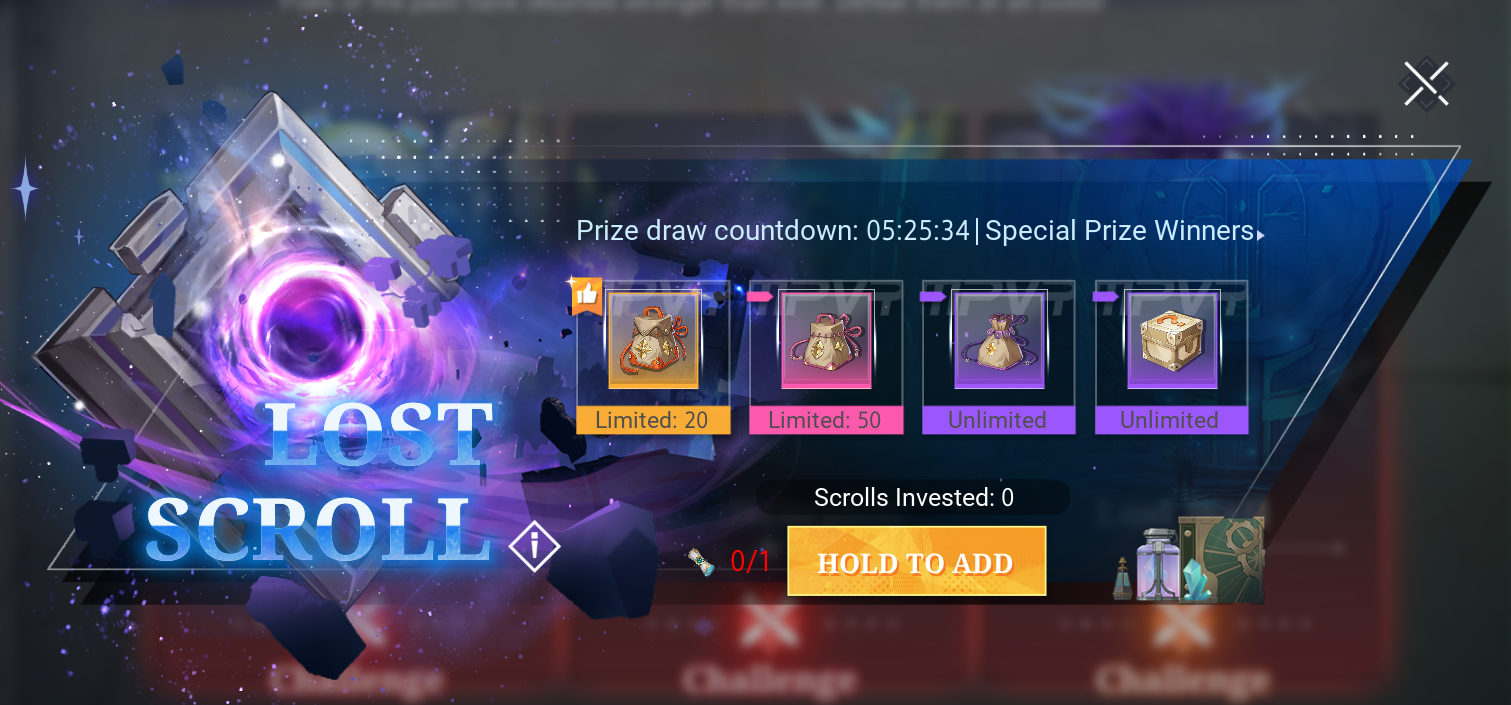
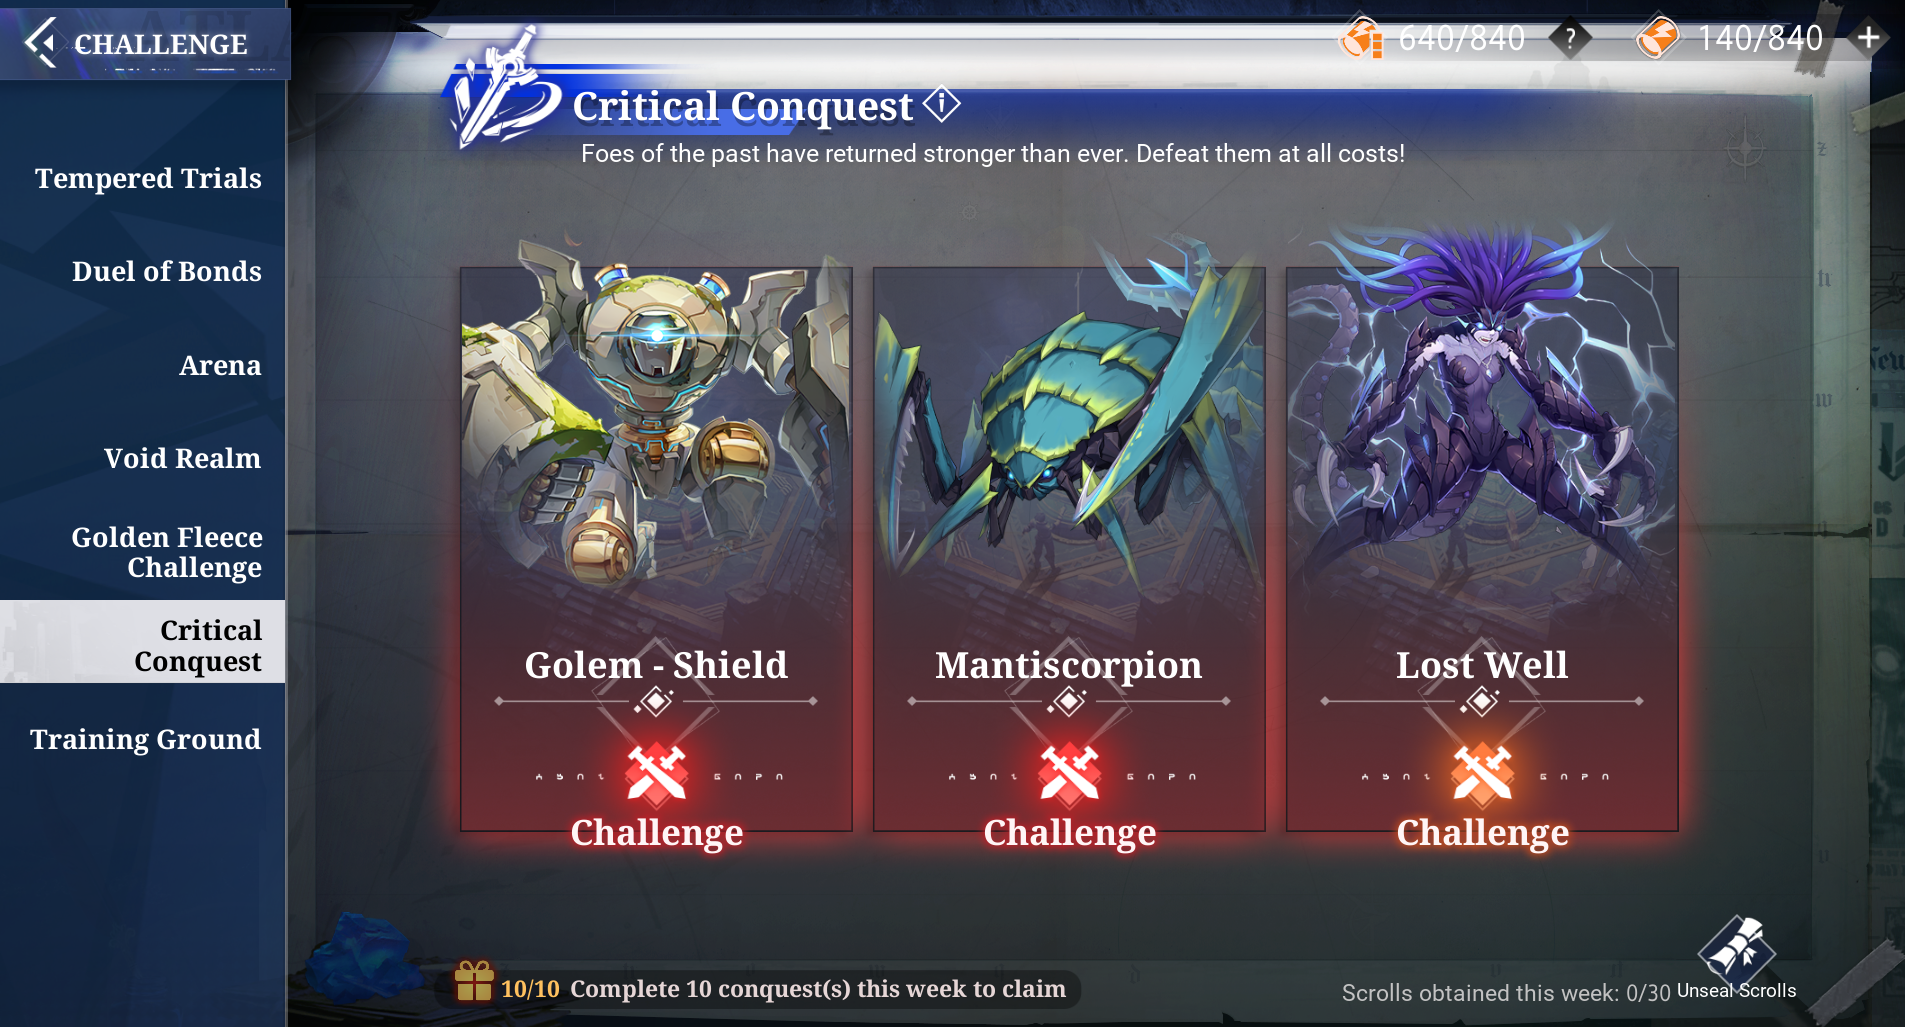
CRITICAL CONQUEST
WEEKLY REWARD
After clearing all Elite and Abyss stages in Chapter 5 and
completing a side quest, players unlock Weekly Conquest. This
challenge can be completed up to 10 times per week per character,
awarding 100 Hunting Permits per run.
Using Account Energy in Weekly Conquest grants Reward Scrolls, which
can be used to enter a raffle for various items.
Prioritizing Character Energy for Purgatory and Void Nest is much more
efficient early on, due to the guaranteed Epic Gear drops those modes
provide.
FARMING
In Critical Conquest, bosses rotate daily, offering different
rewards each day. The first and second bosses do not consume Hunting
Licenses, making this mode an efficient place to farm Insignias,
Gold, and Hunting Permits.
These battles are also generally shorter than Void Valley runs, making
them ideal for quick farming sessions. Players can choose which boss
to target based on the specific Insignia drops they need.
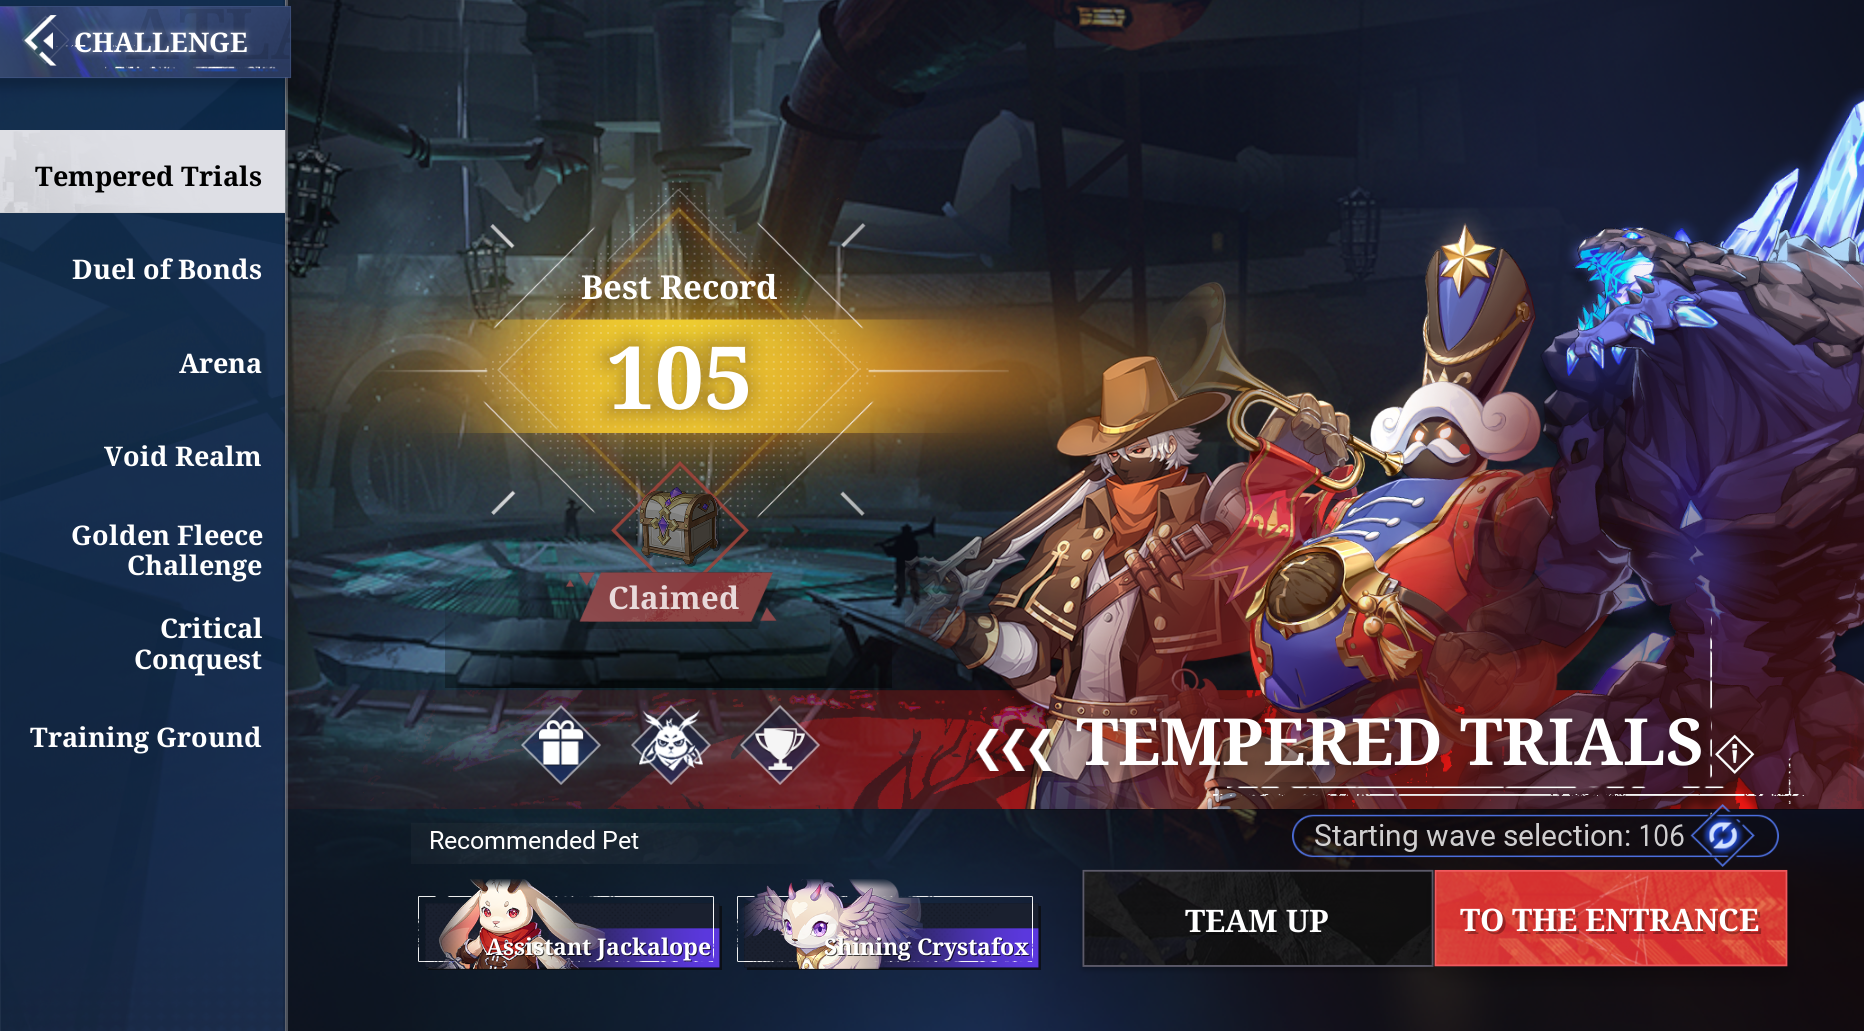
CHALLENGES
TEMPERED TRIALS
Tempered Trials consist of 300 floors with progressively increasing
difficulty. Players receive a one-time reward every 15 floors
cleared, and the daily Bound Gold reward scales with the highest
floor reached.
It’s recommended that players return periodically to push higher floors
and claim the one-time rewards, even if they don’t complete the entire
tower in one go.
ARENA
The Arena is a challenge mode that provides one-time rewards upon completion. It consists of four stages:
- Qualifier
- Elimination Round
- Promotion Round
- Finals
Players can skip directly to the final stage if they meet the
required Power Rating, allowing for faster progression.
Upon completing the normal Arena, the Shura Arena Cup is unlocked—a bi-weekly
event that follows a similar format. However, each stage in the Shura
Arena Cup features unique buffs and debuffs, adding an extra layer of
challenge and strategy.

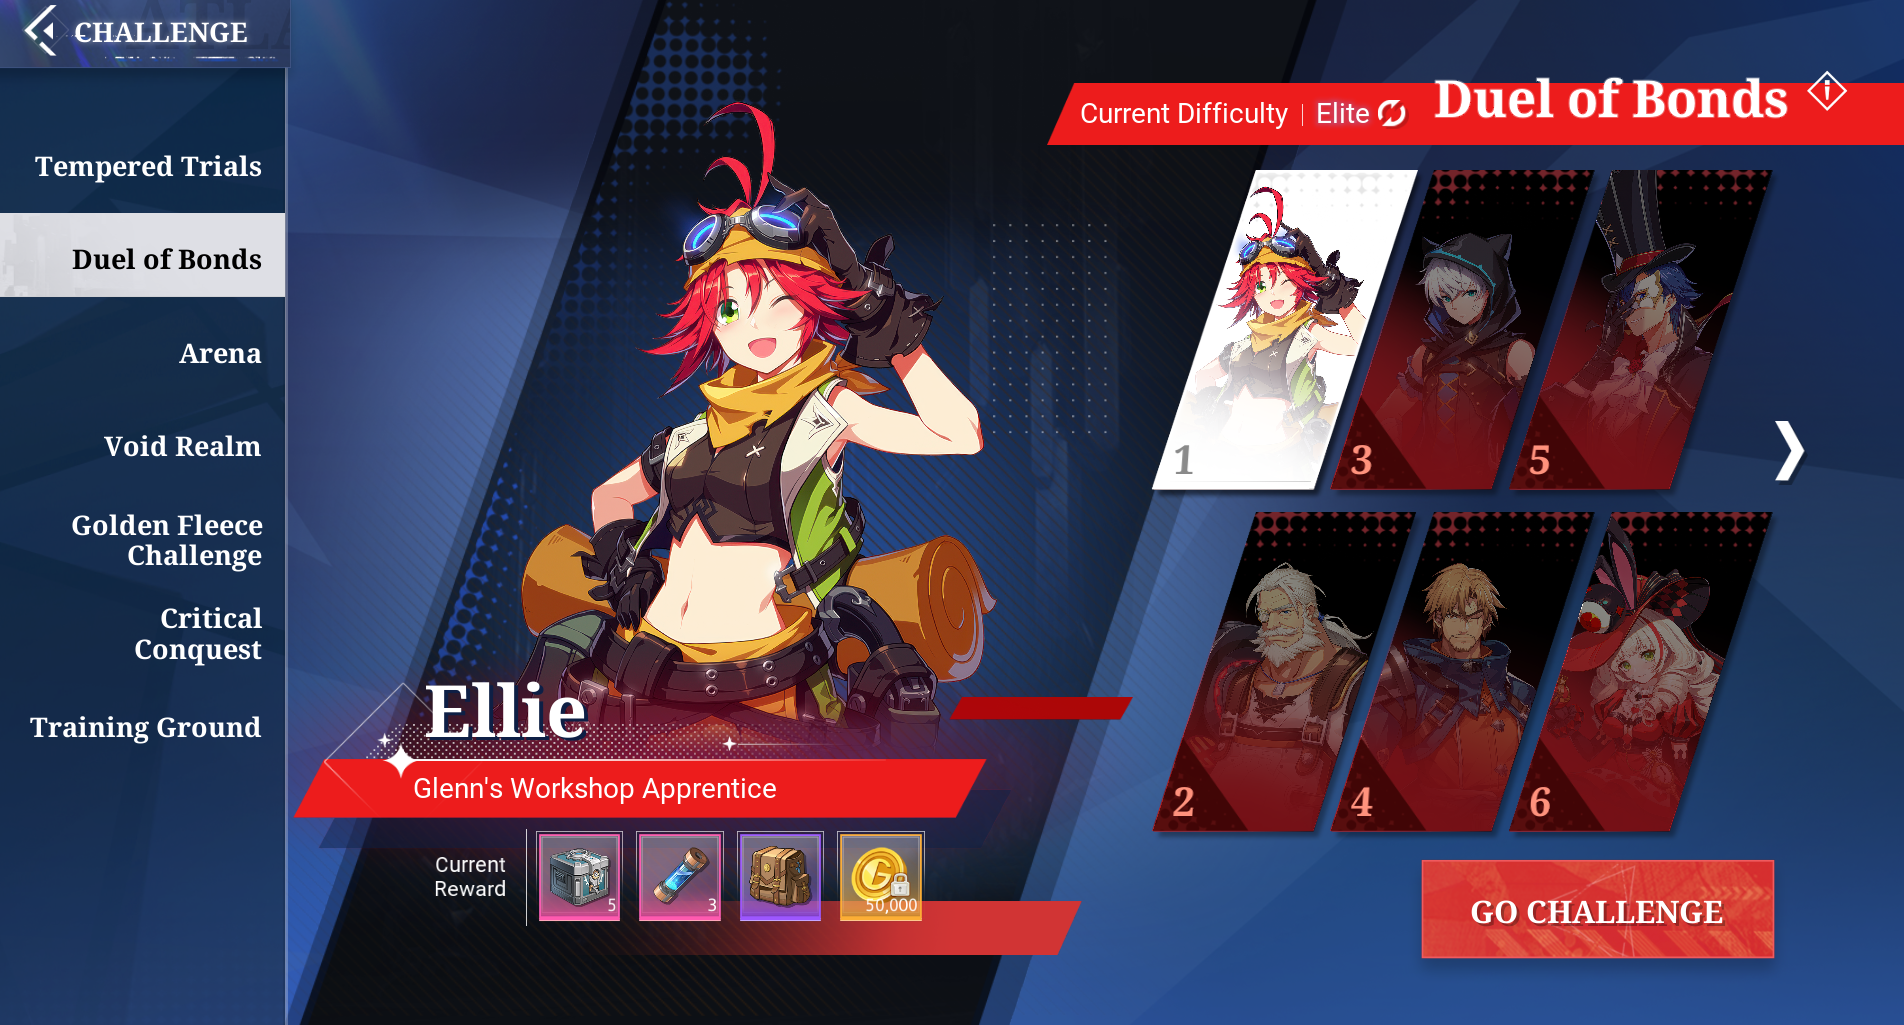
DUEL OF BONDS
In Duel of Bonds, players can challenge NPCs to earn a variety of valuable one-time rewards. It’s recommended to revisit this mode periodically, as new opponents may become available and the rewards are well worth the effort.
BEST SPENDING
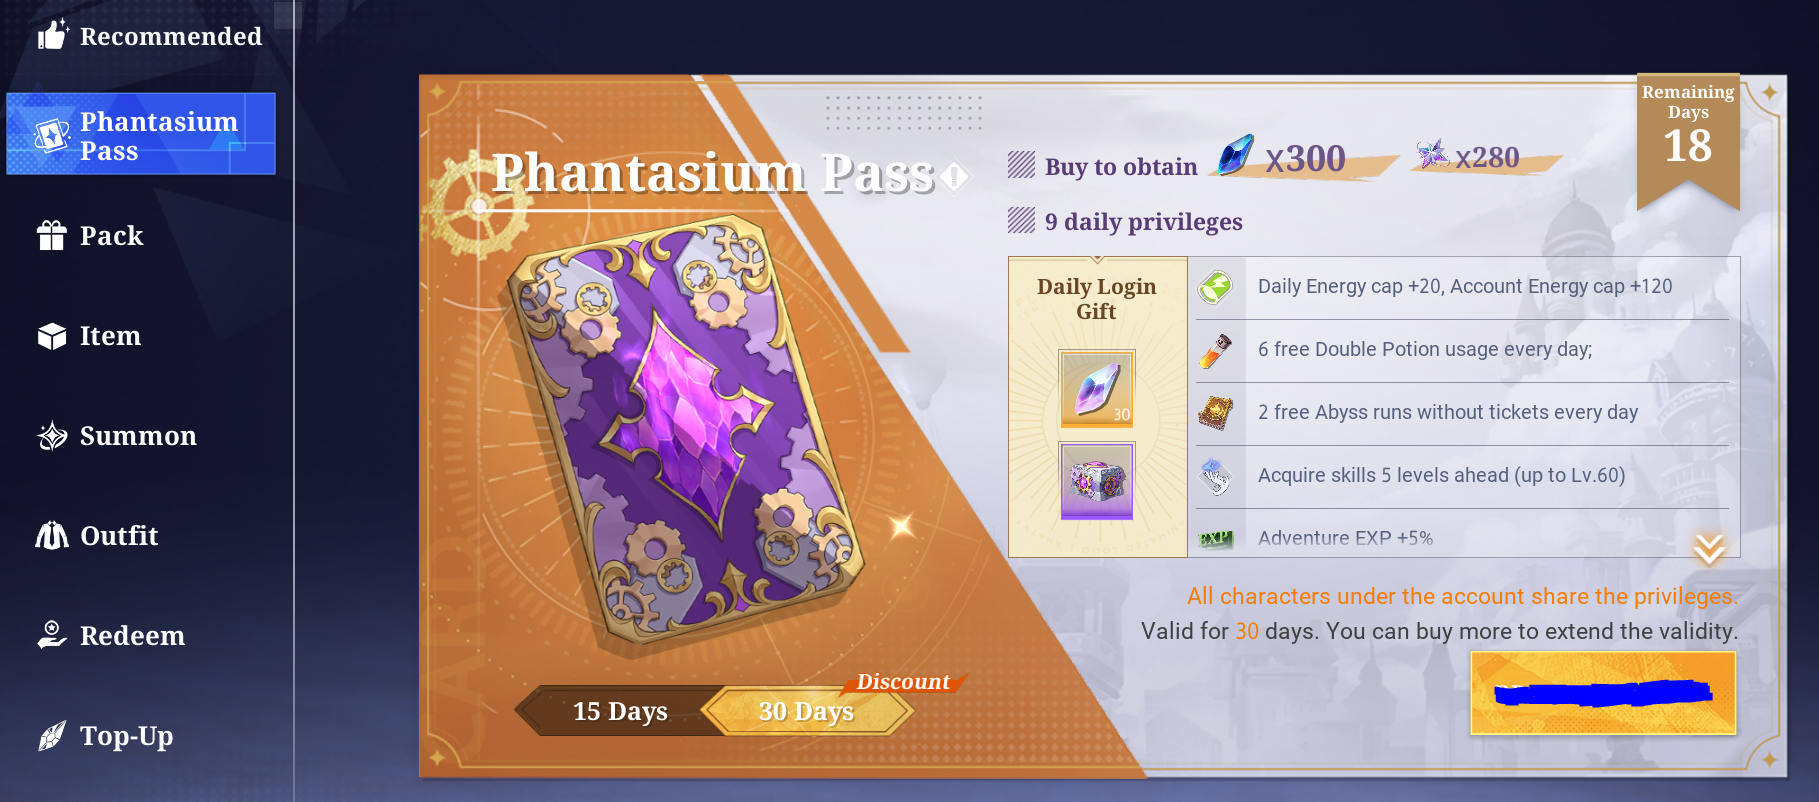
PHANTASIUM PASS
The Phantasium Pass is available in two options:
- 15 days for $2.50
- 30 days for $5
The pass applies to all characters under the same account, making it
a highly valuable investment for multi-character progression.
Players are highly recommended to purchase the monthly pass if possible,
as it offers numerous valuable benefits, including:
- +20 Daily Energy Cap
- +120 Account Energy Cap
- 6 Free Double Potions
- 2 Free Abyss Runs
- Acquire Skills 5 Levels Ahead
- +5% EXP Gain
- +5% Gold Gain
- -10% Trading House Fee
- +4 Trading House Listing Slots
Upon purchase, players receive 300 Opals and 30 Prismadium daily, totaling 900 Prismadium over 30 days. Additionally, a daily bonus bundle is granted, which includes:
- Bound Gold ×3,000
- Calibration Compass ×1
- Maltz's Special Injection ×5
- Revival Capsule ×1
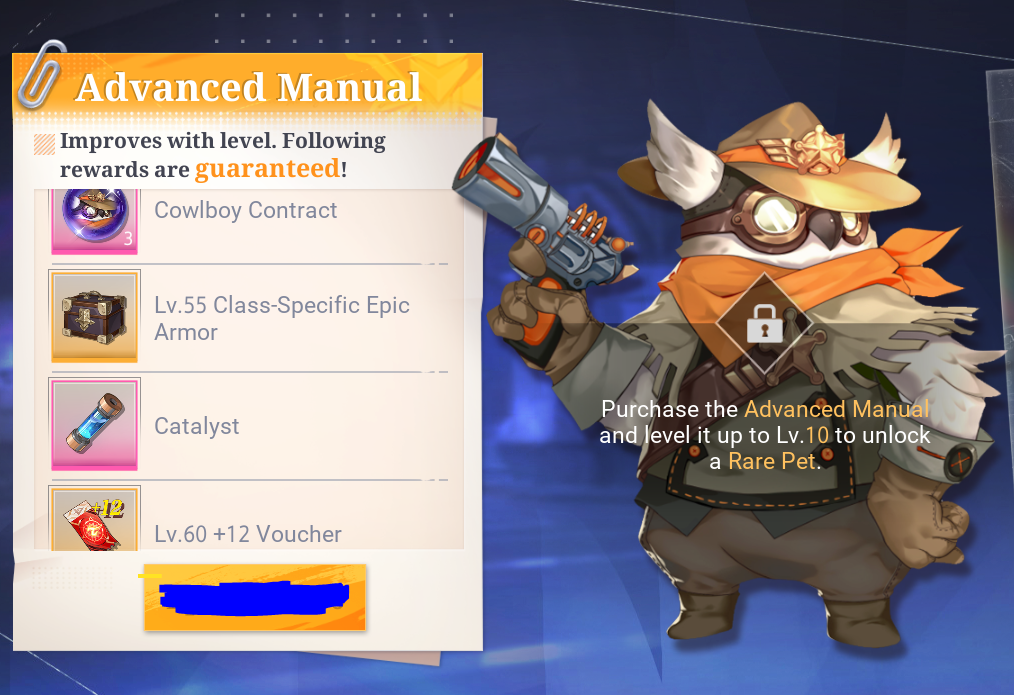
BATTLE PASS
The Advanced Battle Pass is priced at $10 and is recommended for purchase, especially when it features a strong or desirable Pet. The pass offers a variety of valuable rewards, including:
- A fully evolved Pet
- A Level 55 Class Set Gear Box
- 10 Pet Pulls
- Various upgrade and progression resources1
However, if the featured Pet is underwhelming or not useful, players
may choose to skip that season’s pass.
Note that the Battle Pass benefits are limited to a single character,
so it’s important to purchase it on your main character.
ENDGAME
ENERGY USAGE
Since Energy is a limited resource, players are advised to use it strategically for maximum efficiency:
Character Energy- Prioritize Void Nest first, as it offers guaranteed Epic Gear drops.
- Use remaining Character Energy on Abyss Purgatory to build up Pity Count toward additional Epic Gear.
- After completing all Class Set Gear, players can freely spend Character Energy on Weekly Conquest to obtain Unseal Scrolls for the raffle system.
- Focus Account Energy on farming Insignias, which are crucial for progression.
- Choose between Critical Conquest or Void Valley, depending on the required Insignia type.
- Critical Conquest is generally more efficient due to shorter clear times.
Lvl 60 +12 Voucher
After obtaining Level 55 Epic Gear—whether from upgrading Void Set
pieces or as random drops from class-specific gear—players can begin
using +12 Vouchers to enhance them. Manual enhancement is not
recommended, as it consumes a large amount of gold with diminishing
returns. It's more efficient to wait for gear pieces from Vanguard
Boxes or events and transfer enhancements instead.
Transferring enhancement using Flawed Inheritance between gear of the
same level and rarity is completely safe and retains the full enhancement
level. This also applies when upgrading gear.
+12 Vouchers are obtainable through various means, with one of the most
consistent sources being the Commendation Shop, which provides two each
month. Prioritizing voucher use for core gear pieces will help optimize
progression while saving resources.
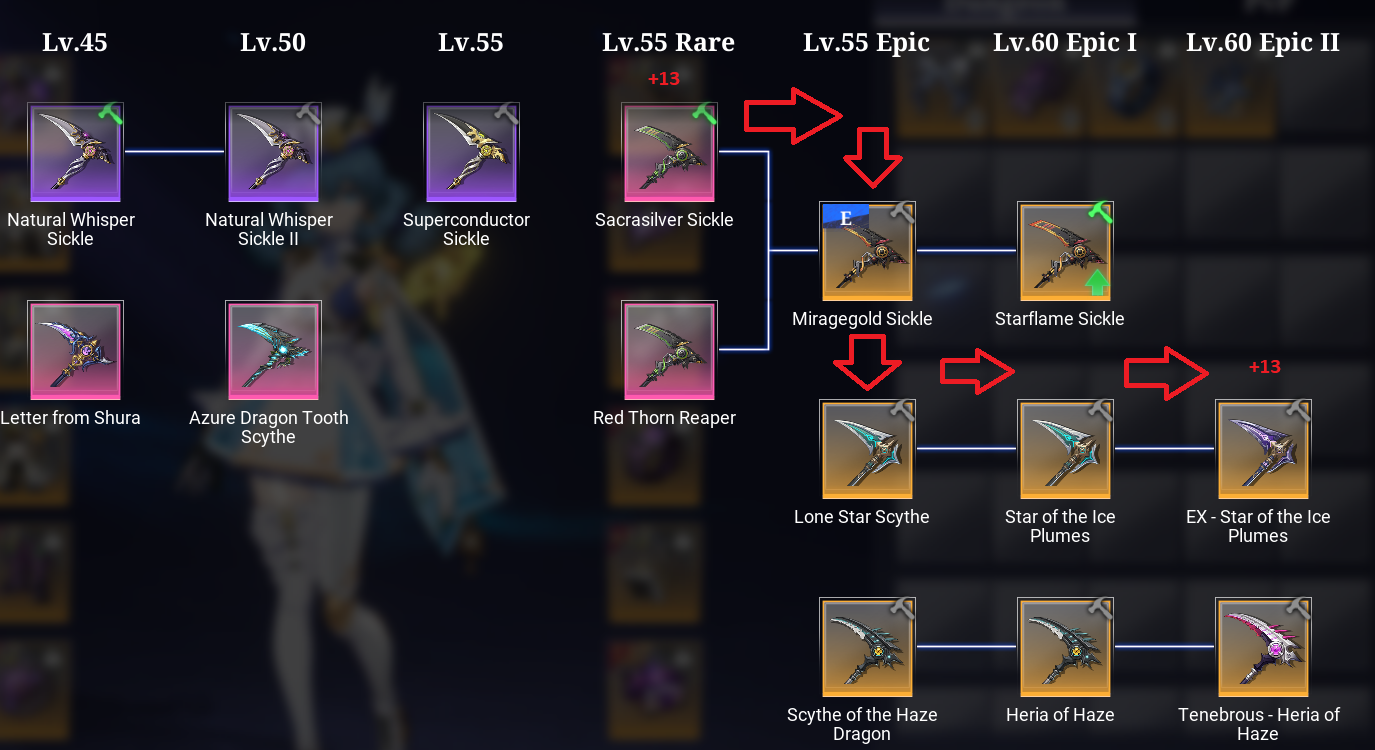
MARIGOLD TRANSITION
Players can safely transfer enhancement levels to a Level 55 Marigold Weapon as a transitional step toward their endgame weapon, using the following method:
- Use Flawed Inheritance to transfer the enhancement to a Sacrasilver or Red Thorn weapon.
- Upgrade it into a Marigold Weapon.
- Use Flawed Inheritance again to transfer the enhancement to a Lone Star or Haze Dragon weapon.
- Upgrade to the final endgame weapon.
This process ensures that enhancement levels are fully retained
throughout, providing a stable power boost without waste.
While this method costs around 3 million Gold and 200 Magitrium, it offers
a reliable path for players who want to maintain combat strength while
progressing toward final gear. However, players can also choose to skip
this step and wait for a direct drop of their endgame weapon if they
prefer to conserve resources.
Do not upgrade a Marigold Weapon to Level 60 Starflame, as the cost in
Magitrium and Gold is extremely high. There are more efficient and direct
routes to obtain an endgame weapon, making the Starflame path unnecessary.
GEAR ENHANCEMENT
Enhancement priority is based on the value of the stats provided.
The recommended order is:
Weapon > Talisman/Seal > Helmet/Gloves/Boots > Everything else This prioritization
is due to Defense Shred being a key stat for increasing DPS, especially
in endgame content.
For efficiency, players are advised to enhance gear evenly, following
these progression milestones:
- +12 All Gear (preferably using +12 Vouchers)
- +13 All Gear
- +15 Weapon
- Max out Weapon beyond +15 if resources allow
From +12 to +13, it’s strongly recommended to use Stable Catalysts
to prevent enhancement loss. These can be crafted from two regular
Catalysts.
Potent Catalysts should be reserved for +15 and above, where the stakes
are higher. Note that going from +14 to +15 is purely RNG-based, but
once a piece reaches +15, enhancement can no longer drop on failure.
BEST WEAPON
Elemental conversion can be easily achieved by consuming specific
foods. These recipes are unlocked via Exploration Rewards and the
Fleet Shop.
If player's class uses multiple elements, it's better to rely on Elemental
Weapons or Insignias, as they convert all other elements—not just Neutral.
On the other hand, if your class only uses Neutral or a single element,
it's more efficient to stick with a Dragon Weapon and handle the conversion
through food instead.
On lvl 70 update, when Gear Engraving is introduced, players can gain
elemental conversion from there as well.
BEST SET
Players are recommended to use their full class set for now, as it
provides reliable performance and synergy. Later on, it may be
possible to replace certain pieces with the Hexchess set for
optimization. However, this approach requires further testing and
analysis, as the math and comparisons have not yet been fully
explored.
For future gearing options, check our guide below!
Level 60 Gearing Route Guide
FINNI COIN
Visit the Merchant Guild and check the Donate tab. You’ll find three
random purple gears available for donation, rewarding 80 + 80 + 50
Likes. Purchase these gears from the Trade Market for around 20,000
Gold each.
This is a highly efficient way to farm Guild Coins, which can be exchanged
for valuable items like Transfer Stones. Be sure to repeat this process
on all alternate characters for maximum gains.
GOLD
Players are advised to sell Shareable Gold on the market as soon as
possible, as its value will gradually decline over time. Converting
it early provides a steady source of Prismadium, which can be used
to pull Outfits reliably.
For all other expenses—such as enhancements and general upgrades—use
Bound Gold instead to preserve your tradeable resources.
OPAL/PRISMADIUM
The most efficient use of premium currency is through the Wonder
Shop, a special shop that appears once per character as a random
drop. Its contents and discounts are randomized each time, offering
varying deals on valuable items.
The top recommended purchases include:
- Outfit Pulls
- Transfer Stones
- Battery (for main character only)
Players are strongly encouraged to focus on the Outfit Banner, as
SS-grade outfits and titles remain relevant even in the CN version,
functioning as bonus gear. Since the banner is permanent, it’s a
safer and more consistent investment.
Pet banners are not recommended for most players, as they are high-risk
with no guarantee of full duplicates, making them better suited for whales.
Save the pulls for better pets , hopefully enough for max copy.
Priority for Outfit Banners are The Supreme One (Title) > Parodin Star Pack (Weapon) > Outfit > Title Insignia.
COMMENDATION
Commendations can be easily farmed through the Ancient Battlefield,
which is only available at specific times during the day. Players
can earn up to 1,600 Commendations weekly per character. Players are
recommended to farm commendation through alts too and share
shareable items like Outfit and Pet Pulls, and transfer to Main.
Recommended shop priority:
- +12 Enhancement Vouchers (if needed)
- Outfit Pulls
- Pet Pulls
- Catalyst
- Potent Catalyst
Focus on what aligns with your current progression, especially enhancement vouchers if your gear is still underleveled.
FLEET POINTS
Fleet Points can be earned through:
- Daily check-ins
- Donating shards
- Participating in Spirit Frenzy
- Various Fleet activities, including Mine Wars
- Potent Catalyst
Best purchases in the Fleet Shop include:
- +12 Enhancement Vouchers (if needed)
- Outfit Pulls
- Pet Pulls
- Catalyst
- Potent Catalyst
- Transfer Stones
INSIGNIA
Since Insignia cannot be removed—only replaced—but can be
transferred to another gear at a cost, it's recommended that players
use Blue Insignia as placeholders (fodder) until their endgame class
sets are obtained.
This approach helps conserve resources while still gaining stat benefits
during progression.
CIRCUIT
Circuits function similarly to artifacts, providing additional stats
and upgrades. Their main stats are mostly fixed (with some
variation), while substats are randomized and unlocked at levels 2,
4, 6, and 8.
When upgrading Circuits, aim for offensive substats such as:
- PCrit / MCrit
- Cyro/Electro/Pyro/Umbro ENH
- Crit DMG
- PAtk / MAtk
- Strength / Intelligence
There are no elemental weaknesses, so it's best to choose one
element and focus on it.
That said, defensive substats like PDEF, MDEF, Physique, Agility, and
Spirit are not necessarily bad and can still provide solid value depending
on your build.
Try to secure at least three good substats before pushing a Circuit to
max level (20). Circuits are independent of gear changes, so it's safe
to invest in them early without worrying about future gear replacements.
BUFF SETUP
To tackle the hardest content in the game, players can enhance their
stats using food buffs. There are three types of food that can
stack: Elemental, Assault, and Protection.
Recommended setup:
- Fried Fruit Skewers – +8% PDEF & +8% MDEF (Protection)
- Carrot Mushroom Rice – +8% PATK & +8% MATK (Assault)
- Any Elemental food – Based on your chosen element (unlocked from Exploration Rewards)
Crit food is not recommended, as players typically already have high
critical chance. Choose an element based on player's best Insignia
drops, and focus on stacking a single element for maximum effect.
Cooking requires gathering materials, which consumes Stamina (1000 per
day). It’s best to start stocking up early.
HEXCHESS RAID
Hexchess Raid is the current endgame content, featuring Solo, 4-Man,
and 8-Man modes. There are a total of 4 bosses, and players can
claim rewards up to 3 times per boss each week.
This raid is essential for obtaining materials to craft Level 60 endgame
gear.
The structure of the raid introduces progressive teamwork mechanics:
- Starts with solo fights
- Progresses to duo battles
- Progress to 4-man battles
- Concludes with 4–8 player encounters
Solo mode is available for players who struggle to find a team and
is significantly easier, though it offers reduced rewards.
The 8-Man Elite Mode is the most challenging version, requiring full
coordination and offering the best rewards, including a limited SS-rank
Title for the first 24 players to clear it server-wide.
More detailed raid mechanics, strategies, and team compositions will
be covered in guide below!.
Hexchess Guide
FAQ
CHANGING SUBCLASS
Players can change subclasses using Soul Stones, which are available for purchase twice a month for 1000 Prismadium each. Using a Soul Stone will convert the attributes on Circuit to match the new subclass’s Magical or Physical properties and change the player's gear, including PvP Gear, except weapon (DOES NOT WORK AT THE MOMENT, NEED MORE CONFIRMATION). However, weapons can be converted using Soul Reconstruction at the NPC in the first town.
CHANGING CLASS
Players will most likely be able to change classes using an Star World Puzzle item from the CN server. This item is expected cost 6480 Prismadium
and only come on around 1st anniversary in CN. This item allow player
to Change Class to another Class, Class-set gears, insignia, outits will
be converted except weapon (from Soul Reconstruction instead).
The first successful conversion will enter a 60-day conversion cooldown
period (the subsequent conversion cooldown period increases by 30 days,
up to 180 days), but you can restore to the previous profession within
7 days. The first conversion consumes 1 Star World Puzzle , and the number
of subsequent conversions increases by 1, with a maximum of 6. The Star
World Puzzle can be purchased through the mall.
HOW MANY ALTS
The optimal minimum is having at least 2 alts to farm Golden Fleece. Having more characters is better, as it allows for increased gold funneling and better overall progression.
IS THIS GAME P2W
PvE is relatively pay-to-win, primarily because spending allows for
faster enhancement progression, resulting in significantly higher
DPS. While all content is technically obtainable for free, spenders
(whales) will have a noticeable advantage in PvE performance. That
said, whales are essential for the in-game economy, as they purchase
gold from other players, allowing free-to-play users to access
premium items.
PvP, on the other hand, uses equalized gear, ensuring a fair playing
field where gear advantages do not matter and rewards depend on player
skill.
Wilderness Lord/Astral messenger
Astral Messenger is a better alternative and can be purchased cheaply from the Trading House. Feel free to buy it for characters without the Supreme One title.
IS PVP MANDATORY
Completely optional — it grants players extra resources such as Vanguard Boxes, Catalysts, and exclusive titles for high-ranking players.
NEW SERVER OR OLD ?
New servers offer a more competitive environment and a fresh experience for new players. However, having whales on the server can be very beneficial, as they help convert Shareable Gold into Prismadium, making it a factor worth considering.
Copyright @ 2025 Boarhat.gg