Beginner Guide
Beginner Guide for Go Go Muffin
Last updated: 30/12/2024

BEGINNER GUIDE
VIDEO
GEAR MECHANICS
GEAR UPGRADING
When enhancing gear, the slot itself is upgraded, rather than the equipment. This means you can swap gear freely and the enhancement upgrades will stay no matter what equipment goes into that gear slot.
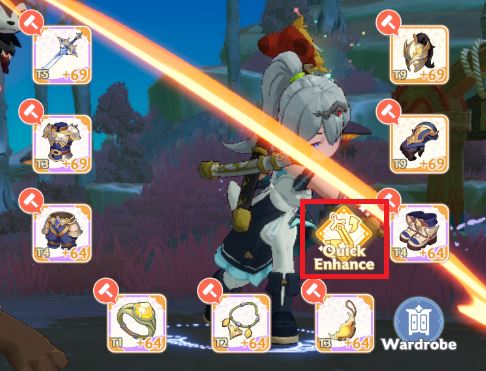
There is a function called “Quick Enhance” that will automatically upgrade your gear. We recommend this function be used until level 65, after which resources cannot keep up to keep them all equally leveled. After level 65, we recommend focusing upgrades on pieces that increase ATK and possibly DEF if there's extra resources.
GEAR RECAST
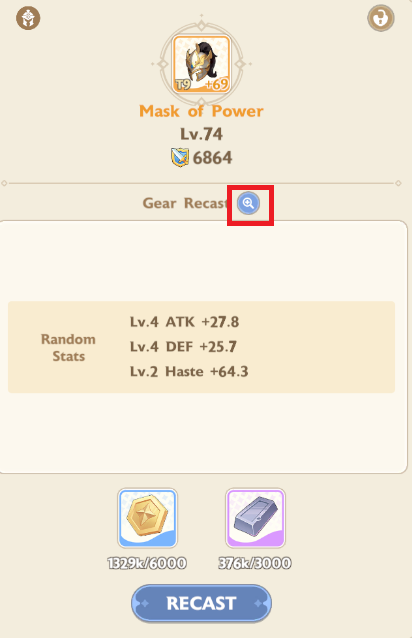
Recasting is a mechanic designed to let you reroll an equipment's substats and its levels. It's important to note that substats and the substat's level are tied to the equipment itself, and will have to be recasted again when you acquire a new piece of gear. Although the resource is plentiful, we recommend diving into this mechanic after getting gear from Rift level 65, as anything obtained before that is easily replaceable. For sub-stat recommendations, check out the specific class guides!
LEGENDARY EQUIPMENT
Legendary Gear is introduced at level 23, when Rift 2 is unlocked. These gears can be forged in the base camp (graphic below) using an Epic+ gear and a crystal (obtained from clearing rifts).
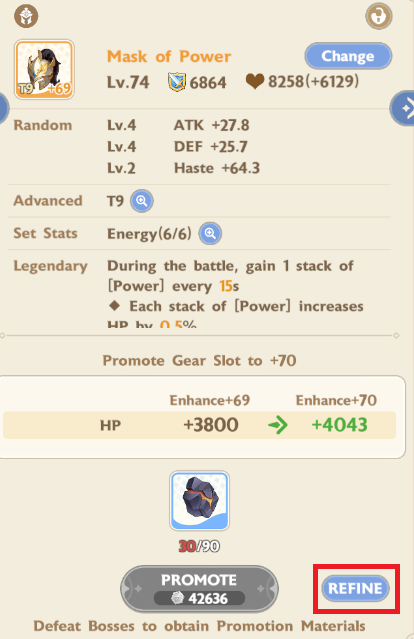
This gear has a special mechanic called “Refining”, in which you can transfer Epic+ gear's stats into the legendary equipment (shown above). Using this mechanic lets you keep your gear levels updated without having to replace your Legendary Gear.
GEAR ADVANCEMENT
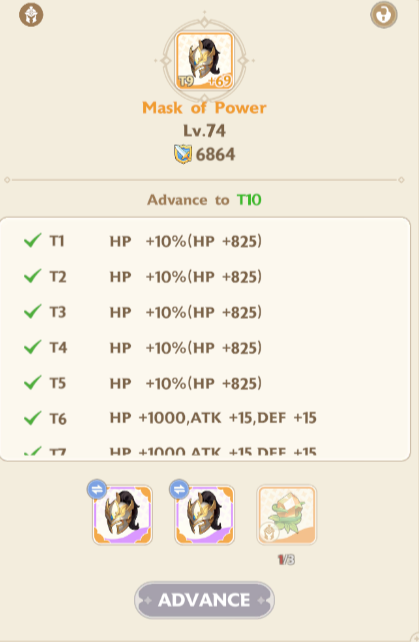
Gear of Epic+ or higher rarity (of the same type) can be combined to
give bonus stats. These tier enhancements can go up to T5 for epic+
gear, and T10 for the first set of legendary gear. The higher the
tier, the more copies are needed to upgrade to the next tier. When
upgrading legendary gear past a certain tier, they’ll need the same
crystals used to craft them (shown below).
Important Sidenote
ADVANCEMENT TIERS ARE TRANSFERABLE. A common mistake new players make
is they dismantle older pieces of gear that have been advanced, not knowing
they can be transplanted to a newer, higher level piece of gear (of the
same type). Below is a step-by-step guide on how to transfer them. Advancement
Transferring Guide 1. Equip higher leveled gear with desired substats
2. Click Equipment and head to advance tab 3. Use the higher tiered equipment
as the sacrifice 4. Press “Advance”
If everything was done correctly, the higher leveled piece of gear should have all of the advancement tiers from the previous gear transplanted. Take note that transferring advancement tiers has a “gear tax”, as instead of using it to advance more tiers, it's used to “transfer” its base level and stats. It's recommended to only transfer if it has a similar/better sub-stats. Losing substats just to increase the base level isn't really worth it.
GEAR SET
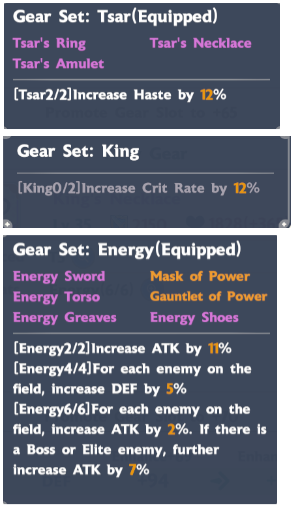
Currently for CC0, there are three gear sets available: one for equipment and two for accessories. The Tsar's set has a higher base level compared to the King's set, meaning it offers superior stats with no alternative at the moment.Note that it might be worth to stay in King's set if you value the crit more than pure stats. However, additional gear sets are expected to be introduced in future updates, so stay tuned for more options!
SKILL MECHANICS
SKILL UPGRADING
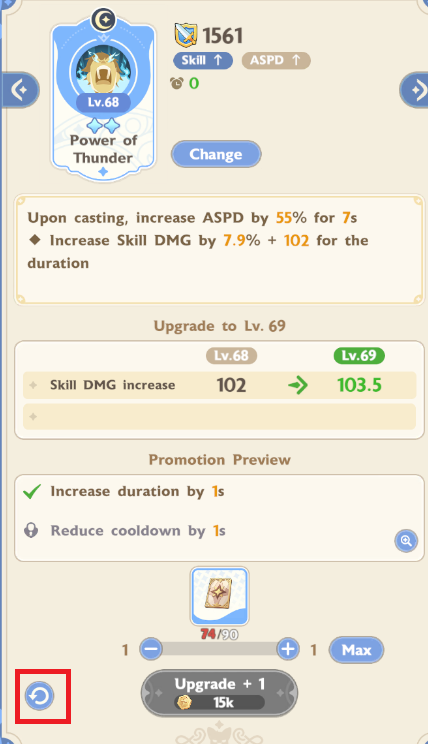
Similar to gears, upgrading a “skill” affects the slot, not the skill itself. This allows you to swap skills in and out without fear. There is also a 100% resource refund button (shown below), so don’t be afraid to upgrade whenever you can!
We recommend prioritizing Core Skill > Tactical Skills > Passives. All skills have important breakpoints at levels 30, 60, 90, 120, and 150, and should be taken into consideration when choosing what to upgrade.
SKILL RARITY
Rarities are divided into 3 categories, Rare (Blue), Epic (Purple), and Legendary (Gold). When obtaining higher rarity skills of ones you have, the “star” upgrades (which we'll cover next) will be transferred, so don't be afraid to upgrade them!
SKILL DUPLICATES AND FRAGMENTS
After gaining your first copy of any skill, any subsequent skill (of that rarity) pulled will give fragments instead. These fragments can be used to upgrade a skill's stars, providing passive effects and stats. The more total stars, the more bonus stats will be obtained. By clicking skill and tapping “Collection Bonus” on the top right, you will be able to see how much it
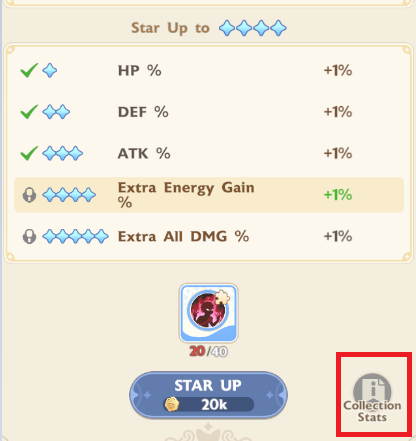
A skill can be starred a total of 15 times. 5 blue stars, 5 purple stars, and 5 gold stars. Blue Star upgrades require pulling Rare (Blue) copies of the skill. Purple Star upgrades require pulling Epic (Purple) copies of that skill, and subsequently Gold Star upgrades require pulling Legendary (Gold) Copies of that skill.
HOW SKILLS WORK
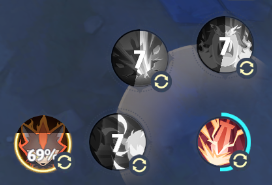
Tactical Skills have fixed cooldowns that can be shortened by increasing your Haste stat. On the other hand, Core Skills are powered by energy, which regenerates automatically over time. You can monitor your energy as the blue bar encircling your Core Skill icon. Increasing energy regeneration from various sources allows you to use Core Skills more frequently, effectively reducing their downtime.
TALENT TREE
Talent Trees are a mechanic tied to the current level of the character, allowing you to obtain stats and modify your current skills. Picking the right trees and paths can make a big difference depending on what you want to achieve.
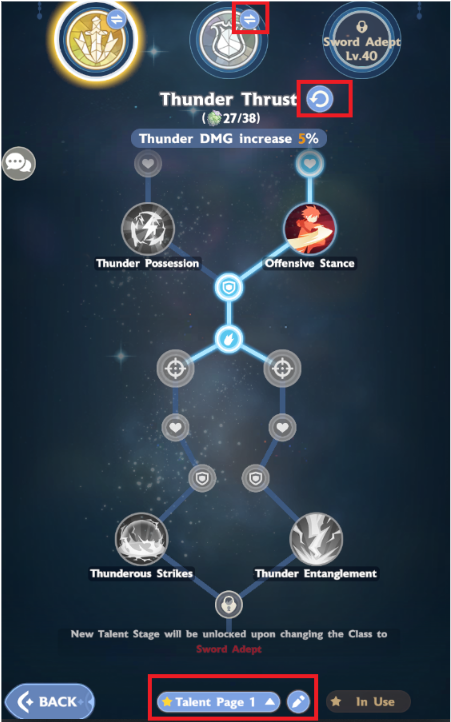
Talent Trees can be reset at any time, so don't be afraid to
experiment. Check out the class builds section here to learn what
should be picked when playing a certain build!
Class Guide
GEM USAGE
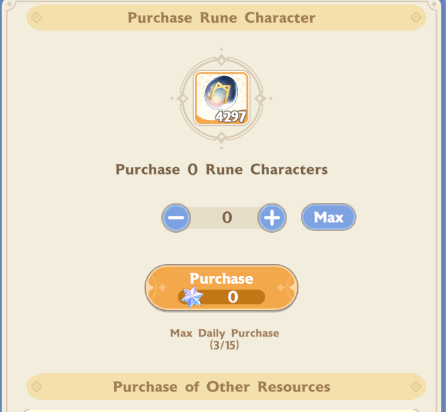
PET MOVES
At level 40, the “pet moves” system is unlocked, allowing players to equip moves on their pet that increases the player's stats significantly. Runes are used to “summon” these moves, and are important when filling out the players stats We recommend buying these 3 times a day, costing 20/30/50 (totaling 100 gems). Refreshing these lets the player have the flexibility to pick and choose which stats they need or are lacking. If you\re looking for recommendations on what moves to look for/equip, check out our pet guide down below!
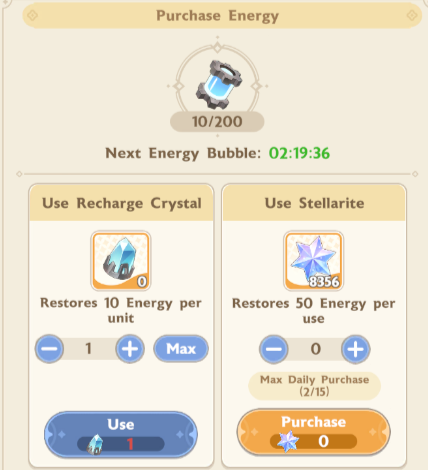
TREASURE HUNT (ARTIFACTS)
Treasure Hunt is unlocked when reaching Stage 14-2 (level 65), which can be accessed either from the camp menu or your character page. Treasures are another system for progression, giving massive stats and bonus damage to enemies and bosses alike. We recommend buying energy refreshes 3 times a day, costing 30/50/80 (totaling 160 gems). Collecting and completing artifact sets for their bonuses are crucial for proper damage gains.
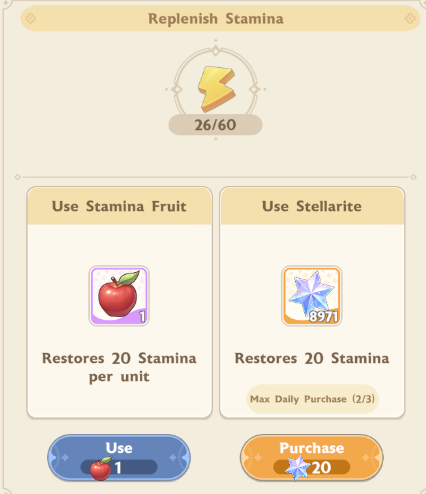
RIFT STAMINA
Gear progression and gear tier advancement heavily relies on repeatedly clearing rifts. The main drops include Epic+ Gear and Legendary Crystals, both of which are used for Tier advancement. Additional Rifts also provide Rift Shop Vouchers which can be used to buy materials that will boost your progression. We recommend starting refreshes at Rift level 2 (unlocked when you hit level 23) purchasing rift stamina 3x a day (daily cap) costing 20/20/20 (totaling 60 gems). Refreshing daily until Epic+ gear is advanced to T5 and Legendary gear to T10 is recommended.
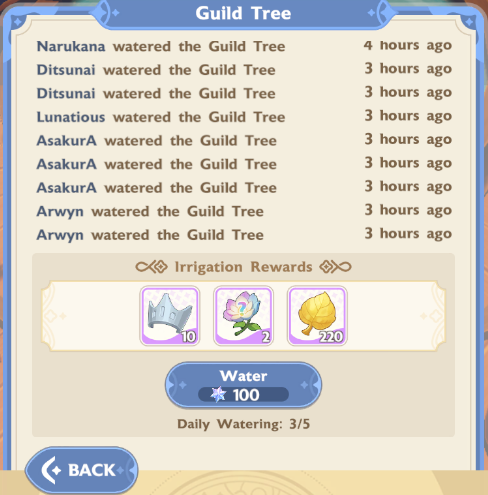
GUILD WATERING
You can water your guild's tree daily for free, with additional watering available up to five times for gems. The first two gem-based waterings cost 20 and 50 gems, providing a total of 440 leaves. In the Guild Shop, a pet pull (costing 150 gems) requires 500 leaves, making this a 45% discount compared to spending gems directly. It's generally worth spending 70 gems on the first two waterings for the Guild Shop alone, but this decision depends on your current Guild Shop inventory and guild requirements. Be sure to consult with your guild, as some may have specific daily watering expectations. Remember, the Guild Shop unlocks more items as its level increases!
SHOP GUIDE
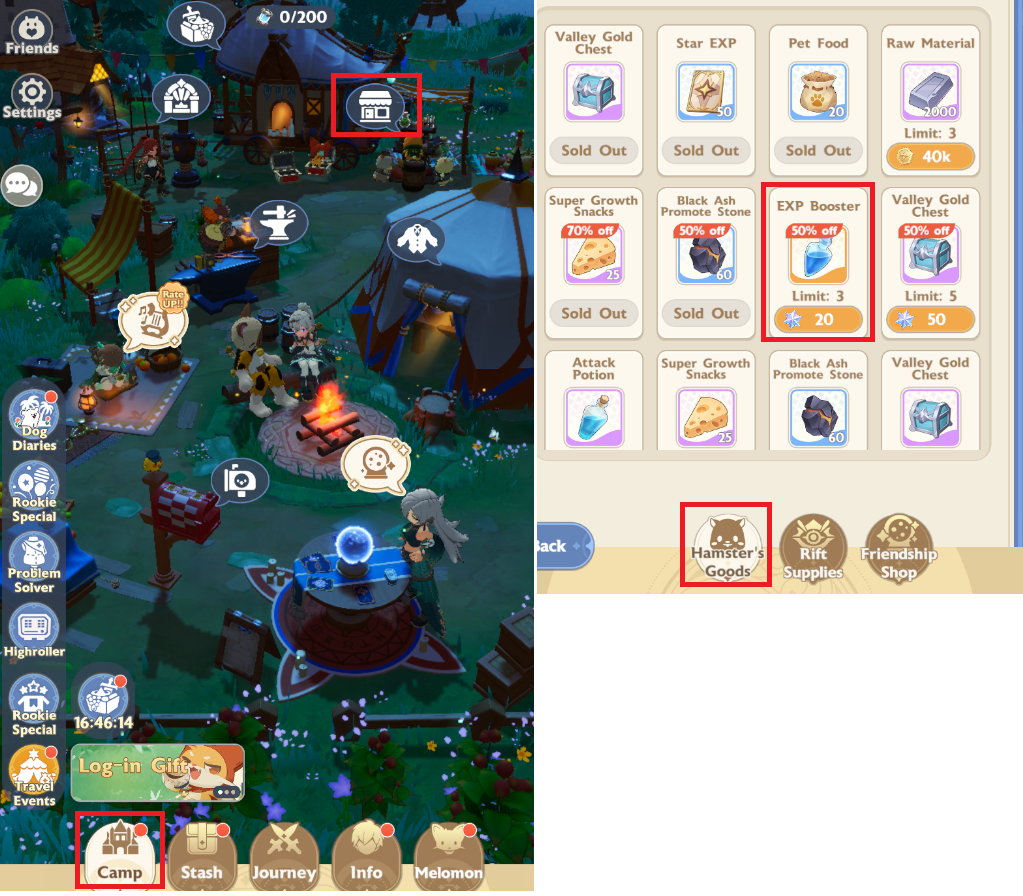
HAMSTER GOODS (DAILY)
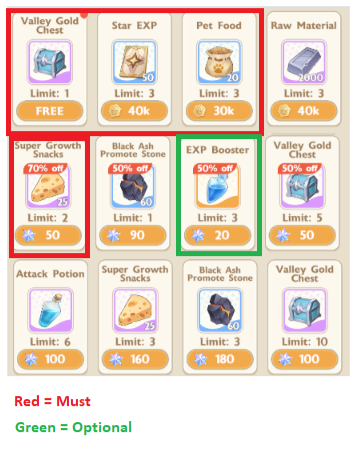
You can access this shop from Camp -> Shop (Top Right). The priority items to focus on are the FREE Gold Chest, Star EXP, Pet Food, and Super Growth Snacks. EXP Boosters are optional, but they can be helpful if you need to catch up. You can buy the 50 gems for 150k Gold when you need it once you reach CC1, because everything is expensive on this stage.
RIFT SUPPLIES
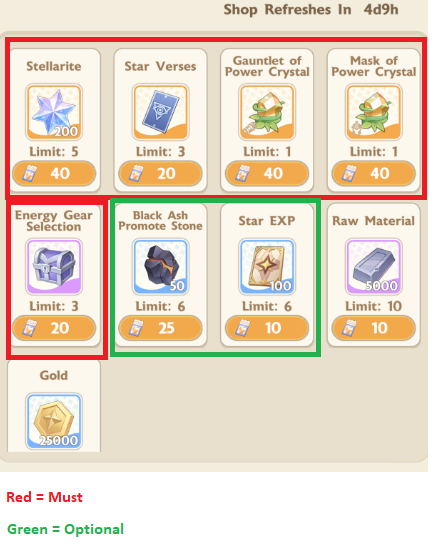
You can access this shop from Camp -> Shop (Top Right), in the 2nd tab. The priority items to focus on are Stellarite, Star Verses (which will upgrade to CC1 tickets after Level 70), Legendary Crystals for Gear Advancement, and Gear Selectors for Gear Advancement.For Gear Selector, the priority will be Helmet and Gauntlets since you still use them on CC1 for quite a while. Avoid purchasing Crystals and Gear if your gear advancement is already capped; it's recommended to check at the end of the week to see what you're missing. Keep in mind that the Energy Gear Selector will no longer be available once you reach CC1, and a few extra Crystals and Gear Selectors will be added for CC1. If you're close to CC1, it's best to save up for those instead. After that, prioritize Promote Stones and Star EXP. Be sure to have enough currency to buy everything by doing the daily stamina refreshes 3 times.
FRIENDSHIP SHOP
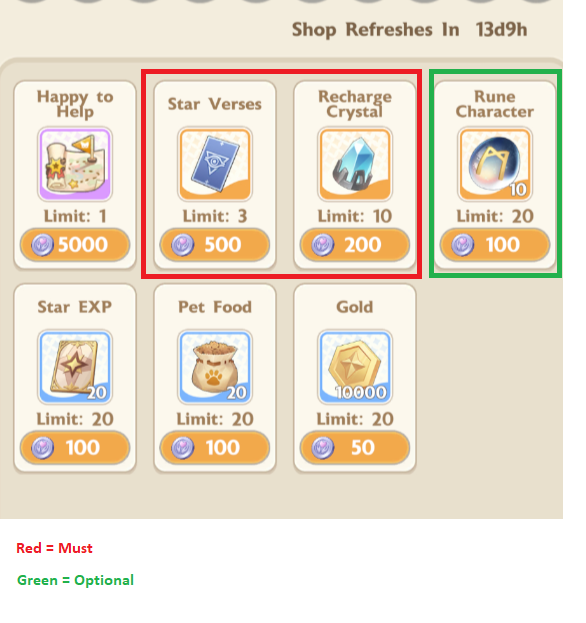
You can access this shop from the Camp -> Shop (Top Right), in the 3rd tab. The priority items to focus on are Star Verses and Energy. Runes are optional, as Pet Moves provide less power compared to Artifacts.
GUILD SHOP
You can access this shop through the Guild Page under the Service Area. The priority items to focus on are Summoning Strings, Pet Food, and Super Growth Snacks. It's recommended to also buy out the Pet Move EXP if you have the currency to spare, because you need a lot of EXP to level up your Pet Moves.

PET GUIDE
WHICH PET TO PICK ?
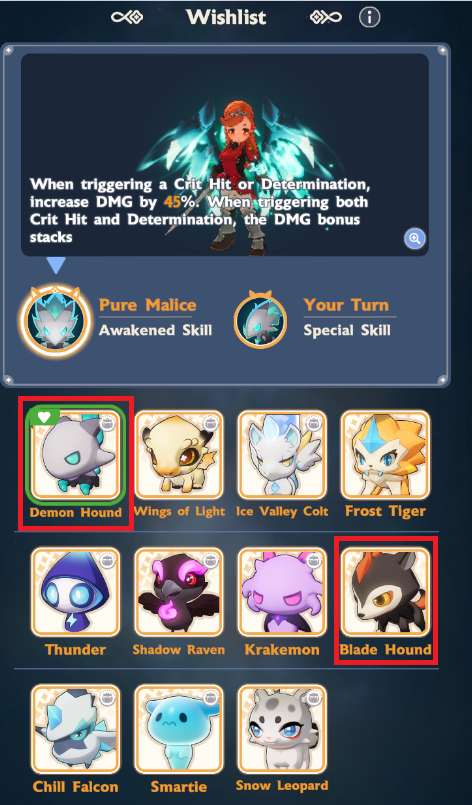
You can access pets at Level 30 and Pet Moves at Level 40. The recommended pet for Swordbearers is Blade Hound, while Demon Hound is ideal for everyone else. There is a limited-time Wishlist function that appears occasionally, allowing you to choose up to 3 pets with a 50% chance of getting the pet you want. It's advised to spend gems until you get one Legendary Pet of your choice, then save. You only need one Blade Hound, as duplicates only increase its passive abilities. If you're aiming for duplicates, prioritize Demon Hound. If you pull a non-wishlist pet, the next Legendary you get will be added to your Wishlist.
PET UPGRADING
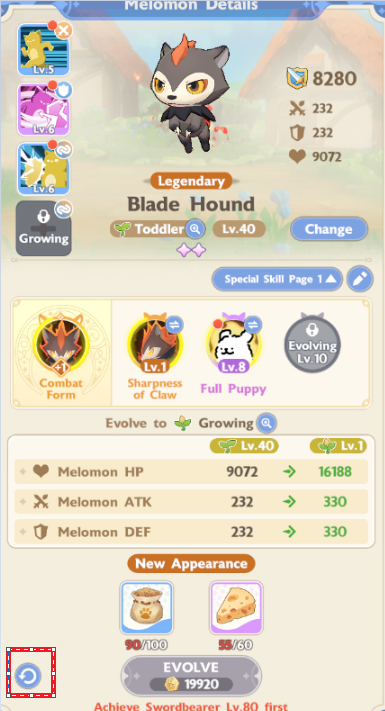
You can upgrade your pet using Pet Foods, progressing from Level 1 to Level 40. Once your pet reaches Level 40, you can evolve it to the next tier. However, you need to reach specific levels before you can evolve the pet. The good news is that you can always refund, so feel free to go all-in on your Main Pet. If you get stuck, upgrade your Secondary Pet and continue progressing.
PET STAR UP
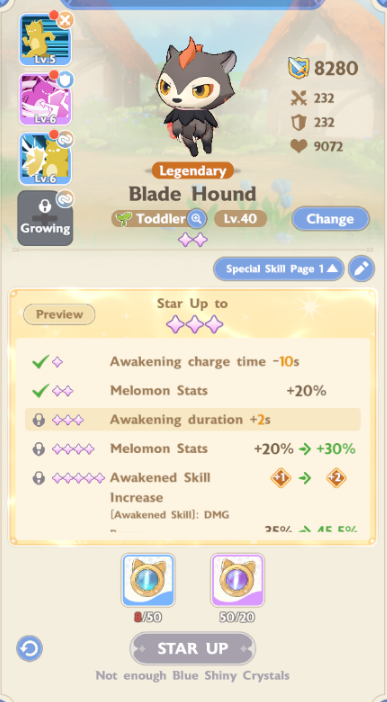
You can upgrade your pet's star rank using general materials obtained from pulling pets. Unlike Skills, these star upgrades don't provide collection bonuses, but they are refundable. Therefore, focus on upgrading your Main Pet first, followed by Secondary Pets, and so on.
PET MOVES
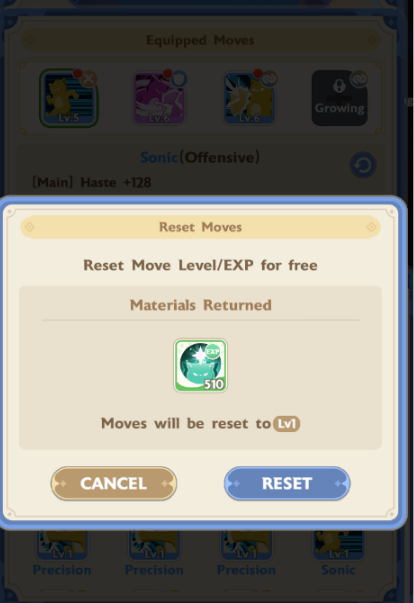
You unlock Pet Moves at Level 40. These moves can be equipped to your pet based on their growth stage. While the moves themselves are refundable, only the EXP is refunded—not the Gold. So, it's important to be cautious, although the cost isn't too high. Pet moves should be equipped on all your active pets for a stats boost. Focus on balancing your stats to avoid diminishing returns and maximize their effectiveness.
ARTIFACT GUIDE
WHAT IS ARTIFACTS ?
You unlock artifacts at Level 65. Artifacts are collectible items that range from Rare to Epic to Legendary, meaning you'll eventually collect them all—they are not equipment. You can acquire them through Treasure Hunts using Energy (Gacha), the Battle Pass, or Paid Packs. Artifacts provide a significant boost to your power.
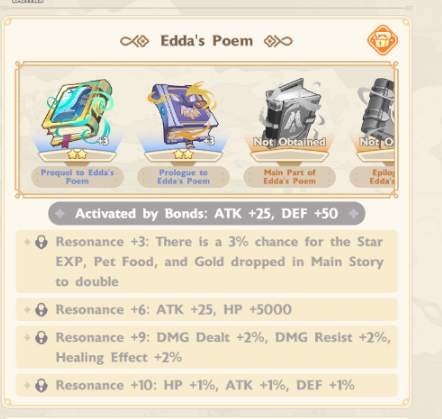
ARTIFACT BOND
Each refinement of your artifact provides an additional stat boost. At +3, +6, +9, and +10, you'll unlock resonance/bond if you have the corresponding set of specific artifacts. The general strategy is to refine all your equipment to +3, as it's inexpensive. then refine the ones with desirable stats or those that resonate with others to +6. Keep in mind that not every artifact currently has resonance with others.
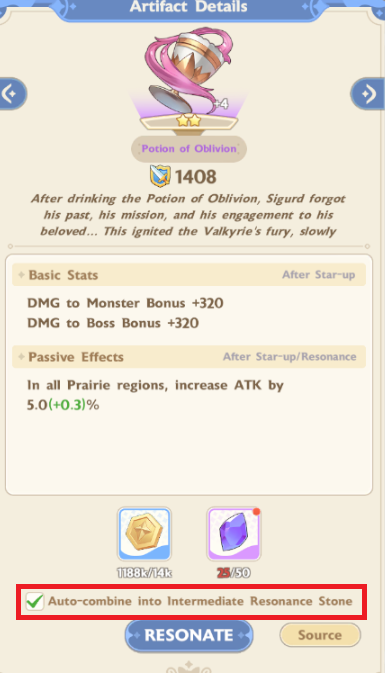
ARTIFACT REFINEMENT
When refining your artifact beyond level 3 to +4 or higher, you'll notice that you'll need materials of higher rarity. Don't worry—if you enable the option below, you can automatically convert lower rarity materials to higher ones. Keep in mind that these materials can still be costly, so be sure to choose which artifact to upgrade carefully, as the upgrades are not refundable.
STATS BREAKDoWN
| Stat | Definition |
|---|---|
| Atk | The base value for increasing your Basic Attacks, Damaging Skills, and Healing Skills strength. |
| HP | Your Max HP. When HP is reduced to 0 after taking damage, your character dies. |
| DEF | Reduces damage taken by a flat amount when damaged. |
| ASPD % | Increases the casting speed of Basic Attacks and Active Skills. Base ASPD% is 100%. |
| Crit % | When dealing DMG, there’s a chance to trigger a critical hit, increased by the crit damage stat. Base Crit (%) : 5% |
| Haste % | Increases the casting, reciting, or channeling speed of Basic Attacks and Active Skills. |
| Determination % | When dealing damage or healing, there is a chance to trigger this stat, making that damage ignore the target’s defense or doubling the healing. |
| Mastery % | Provides bonus damage and healing. |
| Accuracy % | Increases the chance of your attacks hitting an enemy. (against their Evasion Stat) |
| Evasion % | When attacked, there is a chance to trigger Evasion and avoid taking DMG. |
| Block % | When hit by a basic attack, there’s a chance to Block reducing the damage taken (affected by the Block DMG resist stat). Base Block DMG Resist (%) : 50%. |
| Endurance % | Reduces ALL damage taken. |
| Tenacity % | The lower your HP, the higher damage reduction this stat gives. The damage reduction maxes out at 15% HP. |
TIPS AND TRICKS
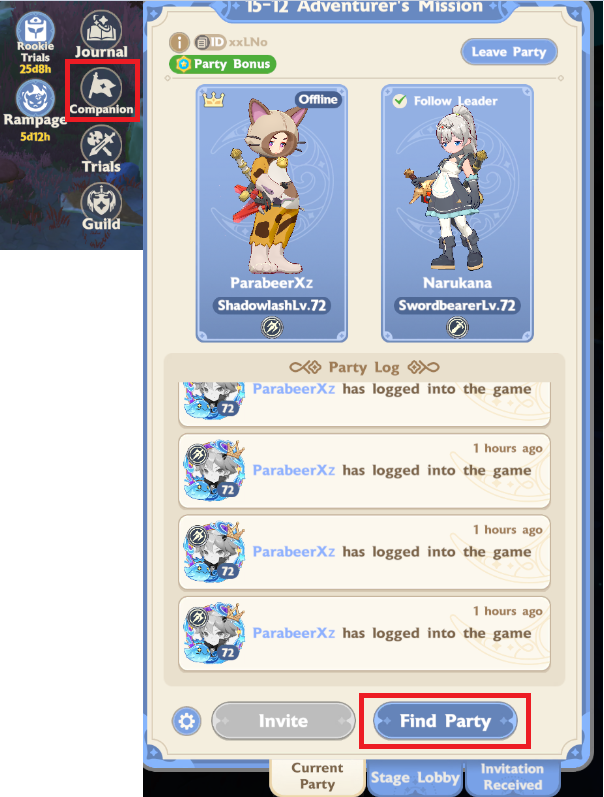
COMPANION SYSTEM
The Companion System lets you team up with another player during your progression, helping you achieve higher star ranks for faster EXP gain. Having a real player as your companion also boosts all EXP gains by 5%, which can add up to a significant advantage over time. If your current party isn't reaching 3 stars on your farming stage, don't hesitate to switch to a different one! To join a party, simply click the companion button shown below.
EXP POTS
As mentioned earlier, these potions are incredibly useful when starting on a new server or catching up on an older one (so you can play with your friends). The 5% EXP boost for 4 hours will accumulate over time, allowing you to farm content more efficiently and earn loot faster! To purchase these potions, simply head to the Camp shown below, go to the shop, and you'll be able to catch up in no time!
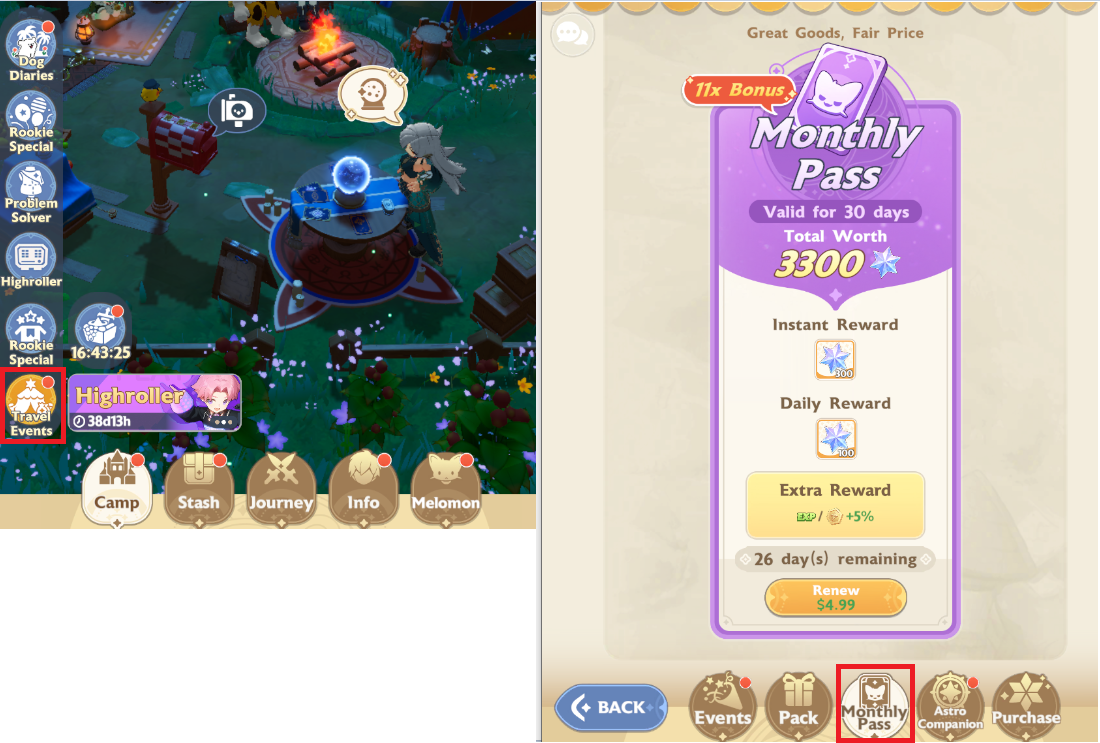
MONTHLY PASS
The Monthly Pass is a paid subscription that provides daily Stellarite for 30 days, totaling an extra 3,300 Stellarite per month. It also offers a valuable, often overlooked progression boost: while active, it increases both EXP and gold gain by 5%. Although this tip is more relevant for paid players, we wanted to include it, as the boost can significantly accelerate your progression once obtained.
FREE DAILY GEMS
The shop provides 50 free stellarite every day, on reset. Be sure to check on this daily!

Copyright @ 2025 Boarhat.gg