CC4 Guide
CC4 Guide for Go Go Muffin
Last updated: 21/7/2025

CC4 GUIDE
OVERVIEW
Welcome to Boarhat.gg’s CC4 Progression Guide Hub. This Progression
Hub contains information and guidance on all new features, content,
and important aspects we believe will impact the player’s
progression.
CC4 has a total of 150 levels, spanning 63 days or 2 months and 3 days
in length.
There are 3 progression caps in CC4. First cap is at CC4 Level 56 for
20 days. The second cap is at CC4 Level 110 for 20 days. The last cap
before transitioning to CC5 is at CC4 level 150 for 23 days.
This guide is sorted by when each content is unlocked to the player for
ease of use. All rift guides unlocked within this class change are compiled
at the bottom for clarity.
SHOP UPDATE
Starting off our CC4 Progression Guide, we’ll be having a Hamster Shop Refresher as many new items have joined the shops and having a refresher on which to grab is a great way to start.
Hamster Shop
Within our first tab, we recommend buying all gold costing items
(listed below), and grabbing super growth snacks and infinity prisms
using stellarite. These are the best bang for buck stellarite items
within this shop for progression.
Gold Costing Materials
- Gold Chest
- Raw Material
- Star EXP
- Pet Food
- Furniture Planks (for Hometopia)
Stellarite Costing Materials
- Super Growth Snacks
- Infinity Prisms
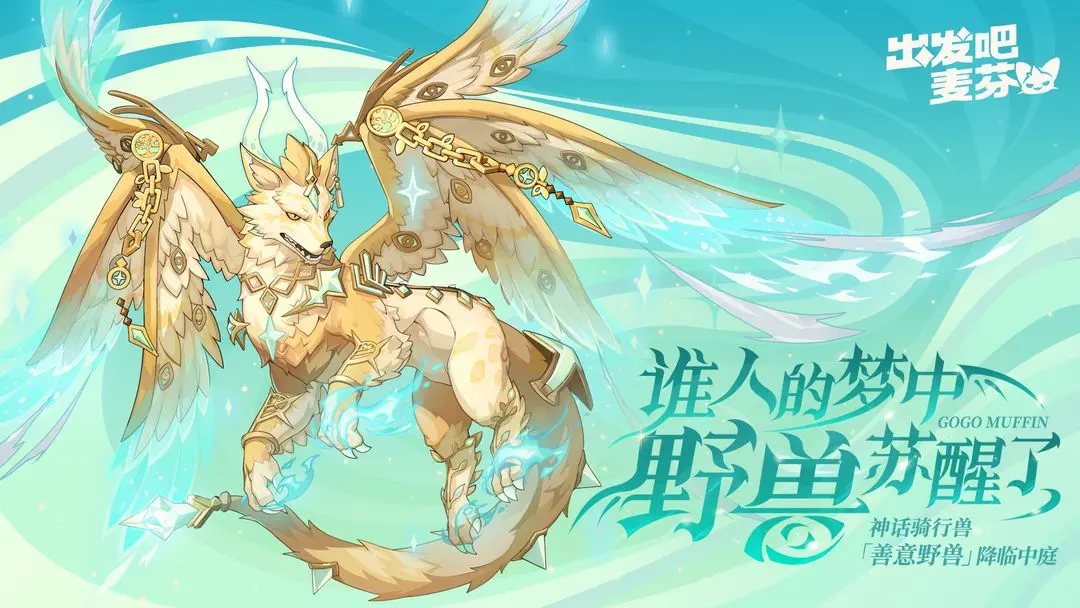
Within the Rift Shop, a new addition in the form of the Benevolent Beast
Point Card has joined the fray. This Point Card is quite expensive, but
we do recommend the players to grab this to progress their Benevolent
Beast as it is a strong mount option.
Rift Shop
Within the Rift Shop, a new addition in the form of the Benevolent
Beast Point Card has joined the fray. This Point Card is quite
expensive, but we do recommend the players to grab this to progress
their Benevolent Beast as it is a strong mount option.
Buy in this priority
- Current Set Crystals (until maxed)
- Stellarite
- Imagined Reality
- Benevolent Beast Point Card
- Star Selection Pack IV
- Infinity Prisms
Only buy these materials if one has a large surplus of Rift Tickets.
Be sure to have enough to guarantee next week’s priority rift items beforehand.
- Epic EXP
- Black Ash Promote Stone
- Star EXP
Friendship Coin Shop
Within the friendship coin shop, the player does not obtain enough
coins to feasibly buy out the shop, so the players will have to
focus on what is relevant for their progression. Here are what
players should prioritize.
- CC4 Skill Summon
- Recharge Crystals
Any Surplus Friendship Coins should be used on previous CC skill summons
for paper plane points as they have the highest efficiency per coin.
CC4 EXCLUSIVE BANNER
A consistent re-occurrence when transitioning into a new Class
Change, the game provides a banner to players that guarantees all of
their class specific legendary skills upon fully drawing this
banner.
The CC4 Exclusive banner allows the player to summon all of their CC4
Class Exclusive Skills as a legendary copy without any duplicates (when
pulling from this same banner). This banner guarantees one legendary
skill at every 40 pulls, although the player can get lucky and get them
earlier.
This banner costs 1000 Stellarite for each 10 pull (or multi) made.
As Class Changes have been lengthening, the value for these Exclusive
Banners have been on the rise. Previously our stance has been to skip
these as previous CCs do not last a significant amount of time.
At this point in time, we do recommend pulling these banners to the end
to grab a legendary copy of the player’s class skills. This is because
CC4 lasts 63 days, giving more than enough value to the player even when
considering the trade off of the stellarite’s value to other progression
systems such as Artifact energy or Mount Tickets.
In terms of cost, this will run the player about 8,000 to 11,0000 Stellarite
for those looking to obtain all CC4 Class Exclusive Legendary Skills
if hitting pity at every skill.
As for the breakdown of the cost, Class Changing provides the player
with 50 CC4 Exclusive Banner Summons. This stellarite range is introduced
by the fact that the following Paper Plane week also provides a range
of 1-30 Summons depending on the player's resource expenditure. This
Paper Plane week can provide more of these Exclusive Banner summons,
although we do not recommend going past 1 cycle as the rewards are not
a high priority.
PRIMODIAL DRAGON
The Primordial Dragon is the first Dragon that players will
encounter through their CC4 Journey, unlocked upon reaching CC4
Level 1.
This section will break down the boss into two parts, a quick strategy
guide and a more indepth breakdown of how each move works and our advice
regarding the specifics of those moves.
Quick Tip: Players can double the dragon rewards they can obtain in a
day when encountering a new dragon. Simply clear the previous dragon
before the next dragon is unlocked. Once rewards are claimed, unlock
the next dragon to claim its rewards as well. This trick is easier to
do on Dragons that are introduced at the start of a CC, as the player
can control when they Class Change, unlike mid-CC dragons where they
unlock out of the player's time/control.
General Strategy
The Arena is split into 6 Sectors. All players should move and
spread out into their own area.
Players should avoid standing in groups of 3 or more as lava will spawn
beneath their feet and deal massive damage in their sector.
The boss spawns “spores” that will gradually fill the arena and slowly
poison the arena, dealing slow trickling damage when there’s a few of
them, while becoming deadly if they spread too much.
To kill these spores, simply have 3 players stand in the sector where
the spore spawned, killing it once lava spawns beneath the player’s feet.
Players should move out of the sector immediately after killing the spore
to avoid over-time damage from the lava.
The boss also has one special attack, slowly creating sector-wide blasts
around the arena in a certain direction (either clockwise or counter-clockwise).
Areas are marked by a growing circle at which point will explode after
a certain amount of time. This attack should be dodged as it can be deadly.
This dragon will need a dedicated tank to soak the damage from its basic
attacks, as it can one shot less tankier classes later in the fight.
Below is a list of all its distinct moves, for an indepth look and breakdown.
Motel Lava
If 3 or more players stand on the same Sector for over 5s, a lava
pool appears to deal massive damage per second to players standing
in it.
Players should avoid standing in the same sector outside of clearing
out ancient parasites to stop lava pools from spawning. Players have
time to react and move as the lava pool takes a few seconds to spawn,
and players are able to see movement beneath their character’s feet when
one is about to spawn.
Ancient Parasite
The Primordial Dragon causes Ancient Spores to fall onto the Sector.
These spores grow for 15s before maturing and releasing toxins to
continuously deal damage to the entire arena. These spores can only
be destroyed by lava pools. Destroying these spores grants all
players the ‘Purification Blessing of Flames’, increasing ATk by 20%
for 8s. This effect cannot stack.
Players should prioritize clearing out these Spores to avoid stacking
damage and wiping out the party. Players are able to time destroying
the spores with their skill bursts to increase damage a decent amount.
Earthen Eruption
Randomly select a starting sector and lead a clockwise or counter
clockwise flame burst to deal massive damage to the players standing
in the sector marked by the primordial dragon.
This attack only affects one sector at a time, allowing players to dodge
this attack quite easily. This attack can be deadly if tanked while there
are full grown spores on the field.
Wave of Flames
Occasionally releases a wave of flames dealing damage to all players
This attack is undodgeable, and therefore requires all parties to have
a healer to stave off the chip damage dealt to the entire party.
Blazing Flames
Releases a devastating energy burst after 3m and 30s has passed,
dealing lethal damage and executing all units in the area before
leaving.
This attack is the primordial dragon’s last attack, dealing massive sustained
damage before executing all players within the arena. This attack will
go through ‘last stand’ so be sure to equip a different talent skill.
LEGENDARY EQUIPMENT
Class Change 4 introduces three new Legendary Equipment Sets. The
Affection, The Blessing, and The Roar Set.
This section will be introducing the gear sets in the order of unlock.
Affection Set
The Affection set provides a decent upfront attack bonus while
providing a defensive buff and an offensive skill-based buff after
casting a skill.
The Affection Set is the main equipment players will farm from CC4 Level
1 to CC4 Level 59.
This set contains 3 Craftable Legendary Equipment; The Weapon, The Greaves,
and The Boots.
The Weapon and Greaves Crystals become available at the CC4 Level 1 Rift
onwards. The Boots Crystal becomes available at the CC4 Level 35 Rift.
| Set | Effect |
|---|---|
| 2/6 | Increase ATK by 18% |
| 4/6 | Every time after a skill is cast, the skill damage received is reduced by 4%. This effect lasts 10s, and can be triggered once every 5s. |
| 6/6 | Every time after a skill is cast, increase skill damage by 32%, which lasts for 10s, and can be triggered once every 5s. |
We recommend swapping over to the full set after reaching the CC4 Level 35 Rift. Swapping pieces out at this point in progression provides little to no advantage due to the massive 6/6 bonus these sets provide.
Blessing Set
The Blessing set provides massive upfront defensive and offensive
buffs giving a slight increase in efficacy after a few seconds in
combat.
The Blessing Set is the main equipment players will farm from CC4 Level
60 to CC4 Level 110.
This set contains 3 Craftable Legendary Equipment: The Weapon, The Helmet,
and The Torso.
The Weapon and Helmet Crystals become available at the CC4 Level 60 Rift
onwards. The Torso Crystal becomes available at the CC4 Level 85 Rift.
| Set | Effect |
|---|---|
| 2/6 | Increase ATK by 19% |
| 4/6 | Increase Def by 10%. Increase Def by an additional 10% every 10s, lasting 5s. |
| 6/6 | Increase DMG and healing effect by 30%. Every 10s, further increase dmg by 6% lasting 8s. |
Healers may opt to change into this set early as the previous sets
6/6 bonus does not include an increased healing effect. The earliest
should be when the full set can be upgraded to T5.
For other classes, we recommended swapping over to the full set after
reaching the CC4 Level 85 Rift. Swapping pieces out at this point in
progression provides little to no advantage due to the massive 6/6 bonus
these sets provide.
Roar Set
The Roar Set provides a decent upfront ATK buff with flexible buffs
depending on what the user is currently doing. The set provides an
endurance buff while being attacked, or giving a damage/healing buff
upon dealing damage/healing.
The Roar Set is the main equipment players will farm from CC4 Level 110
to CC4 Level 150
This set contains 3 Craftable Legendary Equipment. The Weapon, The Greaves,
and The Boots.
The Weapon and Greaves Crystal become available at the CC4 Level 110
Rift Onwards. The Boots Crystal becomes available at the CC4 Level 130
Rift.
| Set | Effect |
|---|---|
| 2/6 | Increase ATK by 20% |
| 4/6 | Increase Endurance by 10% for 5s upon taking damage |
| 6/6 | When dealing damage or providing healing, increase DMG by 40% and healing effect by 30% for 5s. |
We recommend swapping over to the full set after reaching the CC4 Level 130 Rift. Swapping pieces out at this point in progression provides little to no advantage due to the massive 6/6 bonus these sets provide.
COLOSSAL WILDERNESS AREA
A new Artifact Area unlocks at CC4 Level 22, after clearing stage
66-9. ‘Colossal Wilderness’ features 16 new legendary artifacts, and
5 new sets.
As a foreword before every artifact set recommendation, we recommend
leveling all legendary and epic artifacts to +6, rare artifacts to +3,
and rare artifacts part of an artifact set to +6 before considering leveling
any artifact sets to +9.
Below are artifact sets we recommend leveling to +9 before the others.
| Set | Effect |
|---|---|
| Starry Advent +9 | Mastery 1% & Endurance 0.5% |
| God's Trick +9 | Haste 1% & Evasion 0.5% |
We recommend these sets as they provide percentage stats (percentage stats ignore CC stat caps) to high value secondary stats while scaling the best by themselves, as the artifacts to the sets are all legendary.
GENERATION 2 MELOMON
A new generation of Melomons are unlocked upon reaching CC4 Level
44.
This new generation introduces 5 new melomons. Poet Cat, Mr.Flo, Fox
Shogun, Doctor Paw, and Knight Bunny.
These new melomons provide increased effects from the previous generation
and provide unique advantages making sure most pets within this generation
are viable.
Below details the pets and their skills.
Poet Cat

Awakened Skill - Feline Dance
Increase all DMG by 30%, and gains an additional 2.7% Awaken Energy every
second during Awakening, reducing Healing Effect by 50% during the duration.
Passive Skill - Eternal Song
Increases all DMG by 6%, each awakening increase DMG by an additional
3% but resets at the end of the Awaken phase or battle. Stacks up to
4 times.
Mr. Flo

Awakened Skill - Growth Potion
Increase all DMG by 60%, and Increase Element DMG from Core Skills by
60% during the first 10 seconds of awakening.
Passive Skill - Mysterious Remedy
Every 15 seconds, gains 25-30 Hormone Stacks, each stack increase ATK
by 1.2% for 15 seconds.
Fox Shogun

Awakened Skill - Storm of Metal
Increase all DMG by 30%. Ends the current Awakening and refunds 5% of
Awakening progress for every second remaining up to 10 seconds and increases
DMG during the next Awakening by 3%.
Passive Skill - Retribution orb
When Awakening starts and ends, delas True DMG equal to 100% of ATK to
all enemies and Increase all DMG dealt by 8% for 20 seconds. This effect
can be stacked, with the durations calculated separately. This effect
has a 8 second cooldown on activation.
Knight Bunny

Awakened Skill - One Man Army
Increase all DMG by 60%, taunts all enemies when cast and all enemies
that target the character take 8% more DMG from allies
Passive Skill - Irresistible Force
Increase all DMG by 15%, and by an additional 3% for every 20% HP the
target loses, stacks up to 4 times.
Doctor Paw

Awakened Skill - Puppy Cheering Squad
Increase Haste by 30% and all DMG by 30%, Increase all allies’ ATK by
12% while Awakened. does not stack.
Passive Skill - Therapeutic Inspiration
Gain 4 stacks of Encouragement when entering combat, then gains an extra
stack of Encouragement every 10 seconds. Each Stack of Encourage increases
ATK by 2.2% per stack. The maximum extra stacks allowed can be no more
than twice the amount of allies in a party.
Below is an example of how to calculate Encouragement’s max stacks:
In a party with 4 Party Members
4 (Base Stacks) + 8 (4 Members x 2) = 12 Encouragement Stacks (after
80s)
Final Verdict
Poet Cat is recommended over Fox Shogun, but both are equally viable.
| Role | Gen 2 Melomon |
|---|---|
| DPS | Poet Cat / Fox Shogun |
| Healer | Doctor Paw |
| Tank | Knight Bunny |
For a more indepth breakdown of why we arrived at these conclusions, check out our Melomon Exchange Guide which goes into more detail about everything generation 2 melomon!

Melomon Exchange Guide
GENERATION 4 MOUNT
The newest set of mounts are unlocked upon reaching stage 75-5, at
CC4 Level 103.
There are 4 new mounts added to the collection, each having their own
niche and usage. Below details the mounts skills and our recommendations
on the usage of each mount.
| Name | Stats | Opening Skill (Max Level) |
|---|---|---|
| Canary-09 | Haste + Tenacity | [Eight Notes] Increase the ATK of the character by 22% + 12000, and gain the Echo of Eight effect - Increase mastery by 12% for 5s after casting a Tactical Skill. |
| Apostle-45 | Determination + Evasion | [Command:Clear] Attack 4 times with DMG equal to 1200000% + 100000 ATK to all enemies, increase their DMG received by 22%, and stacks 3 layers of a powerful deterrent effect - in current battle, each layer further increases the DMG taken by an additional 10%; reduce 1 layer every 20s |
| Kettlebell Machine-78 | Mastery + Block | [Swing those kettlebells!] Attack 6 times with DMG equal to 400000% + 160000 ATK to all enemies and obtain the Kettlebell Counterattack Effect - Upon taking DMG in the current battle, trigger a DMG of 800000% ATK, boost the player’s DMg by 22%, and reduce the basic attack DMG received by 8%. Effect lasts 12s, with a cooldown of 8s. |
| Explorer-997 | Crit + Endurance | [Command: Unbox] Increase the DMG dealt by the Character by 20% + 12000, and obtain a Periodic Supply - in the current battle, every 10s, randomly receive a buff increasing damage by 10% for either “Core Skill”, “Tactical Skills”, or “Passive Skills & Basic Attacks”. These individual buffs expire independently from one another and last 20s. |
Recommendation
DPS
There are 2 Recommendations in terms of Mount Selections for DPS. Both
Explorer-997 and Apostle-45 carve out their own niche based on their
effects. Explorer-997 is better in longer fights, with its refreshing
buffs beating out its competition. Apostle-45 excels during shorter fights,
as it applies a massive DMG Taken debuff on the enemy, lasting 60s. For
Fights longer than that, we recommend running with Explorer-997.
Tanks
We recommend tanks to run Kettlebell Machine-79 for its massive counter
effect and basic attack damage reduction.
Healers
Healers are advised to run Canary-09 as it provides the highest ATK boost
out of all Mounts, providing the biggest increase to healing. This mount
boosts mastery as well making it a healer’s perfect companion.

For a more in depth guide on generation 4, their bonus skills and the collection bonus players should prioritize, check out our mount guide below!
Mount Guide
GOD-SEALED CITY DRAGON
The God-Sealed City Dragon is the second and last dragon players
will encounter through their CC4 Journey. This boss is highly
volatile and will punish any parties that are not paying attention.
This dragon is unlocked upon reaching CC4 Level 71.
This section will break down the boss into two parts, a quick strategy
guide and a more indepth breakdown of how each move works and our advice
regarding the specifics of those moves.
General Strategy
The Arena is split into 6 Sectors. All players should move and
spread out into their own area.
The boss has 3 attacks that can decimate parties if not handled properly.
The boss will randomly lock 1-2 players with a target sign above their
characters heads. After a few seconds have passed, continuous lightning
bolts will be targeting the current sector the player is standing on.
Players should move and avoid having the thunderbolt hit the same sector
twice as it will deal an aoe that heavily damages the entire arena.
The boss selects a portion of the arena as a target and prompts 3 tile
wide sweep attacks. After attacking, the boss then quickly sweeps the
other 3 tiles on the other side of the markers. Players will have plenty
of time to set up dodging and should immediately prepare moving between
these attacks.
Last but not least, the boss has a move where it picks one sector from
the arena to mark. Players must gather in the marked sector to tank this
attack. This attack’s damage is spread through members standing within
the same sector, so the more the merrier. Failing to absorb this attack
will deal massive aoe damage to the entire party. If not enough players
are within the sector sharing the damage, it may also wipe those trying
to absorb it.
Below is a list of all its distinct moves, for an indepth look and breakdown.
Sacred Thunderclap
Every second, deals 20% ATK as damage to all players in the
arena/field.
Passively damages the entire party, requiring the party’s composition
to field a healer.
Sacred Thundercloud
After recitation, the God-Sealed City Dragon unleashes the Holy
Thunder mark, locking onto 1 or 2 random players. This mark
continuously generates Thunderclouds above the marked player’s head,
dropping holy thunder to deal damage to players within the same
sector. When 2 thunderclouds converge, Holy Thunder is immediately
cast, dealing damage to all players within the arena and applying a
vulnerability debuff that increases subsequent damage taken. This
vulnerability debuff can stack.
Players should move left and right when marked to avoid stacking thunderclouds,
which will deal massive damage to the entire party.
Players should also avoid stacking in one area to prevent the instant
holy thunder from hitting the party.
Sacred Thunderstrike
Unleashes Holy Thunder once, dealing damage to all players
Low damage untargeted AoE attack. This attack should be non-lethal and
can be considered chip damage. The party should bring a healer to deal
with the chip this attack deals to the party.
Holy Smite
The dragon locks onto a sector and starts reciting. Once the
recitation ends, it attacks the targeted sector, dealing massive
damage that is shared among all players within that sector. When
there are no targets within the sector, the dragon proceeds to cast
holy thunder, dealing damage to every party member within the arena
and applying a vulnerability debuff that increases subsequent
damage. This vulnerability debuff can stack.
The party should aim to stack their characters within the targeted sector
to avoid having massive damage and a vulnerability debuff applied to
the whole party.
Electrified Claw Strike
Chooses a target direction and executes an Electrified Claw Strike,
dealing massive damage to the sector and applying one stack of
Vulnerability, increasing subsequent damage received. The Dragon
then picks the opposite direction and delivers another Electrified
Claw Strike.
The first Claw Strike has a massive cast time, so players will have time
to dodge this attack. The subsequent Claw Strike hits behind the first,
so players will need to move back to their old position to dodge the
second strike.
Cleansing the World
Release destructive energy, dealing 8% ATK as damage to all players
every 0.5s for 4s, executing all players alive once it ends.
This attack is the God-Sealed Dragon’s last attack, dealing massive sustained
damage before executing all players within the arena. This attack will
go through ‘last stand’ so be sure to equip a different talent skill.
CITY OF WHITE SAILS AREA
A new Artifact Area unlocks at CC4 Level 115, after clearing stage
76-17. ‘City of White Sails’ features 16 new legendary artifacts,
and 5 new sets.
As a foreword before every artifact set recommendation, we recommend
leveling all legendary and epic artifacts to +6, rare artifacts to +3,
and rare artifacts part of an artifact set to +6 before considering leveling
any artifact sets to +9.
Below are artifact sets we recommend leveling to +9 before the others.
| Set | Effect |
|---|---|
| Beneath the Abyss +9 | Mastery 1% & Endurance 0.5% |
| Archival Reprieve +9 | Haste 1% & Evasion 0.5% |
We recommend these sets as they provide percentage stats (percentage stats ignore CC stat caps) to high value secondary stats while scaling the best by themselves, as the artifacts to the sets are all legendary.
ASTRAL RELIC
Astral Relics are Special Relics that can be unlocked starting from
CC3. The player will need to go through a gauntlet of quests,
Perilous Trials, and Echoes of Wars to fully unlock the relics.
CC4’s Relic is the Ascension Device, giving the player a massive boost
in damage dealt and reduced damage taken when in CC4’s Regions.
Second Relic - Ascension Device
Unlock: Phase 1 - CC4 Level 1 / Phase 2 - CC4 Level 91
Base Effect
Increases DMG dealt by 0.50%, and reduces DMG taken by 0.50%. These effects
are tripled when exploring the following in-game regions: Colossal Wilderness,
Horizon, and City of White Sails (including main quests 65-1 to 82-24
and their corresponding trials).
Max Level Effect
Increases DMG dealt by 1.8% and reduces DMG taken by 1.8%. These effects
are tripled when exploring the following in-game regions: Colossal Wilderness,
Horizon, and City of White Sails (including main quests 65-1 to 82-24
and their corresponding trials).
There are two phases of quests to fully unlock the Ascension Device.
Each phase contains 12 quests and grants rewards on each quest cleared.
Clearing these quests “Recharges” the artifact, contributing progress
to a milestone type progression system, giving larger and larger rewards
the more quests the player finishes.
Both phases grant milestone rewards, encouraging the players to finish
all the quests for a full star copy of the artifact.
Phase 2 is designed for players to tackle later down CC4.
All in all, each phase has 12 quests, with every quest giving 50 Stellarite.
This totals to 12 x 2 x 50 = 1,200 Stellarite from only the quests themselves.
When factoring in the Milestone Rewards, in total the player obtains:
2500 Stellarite
10 Rich-Flavored Flour (Gold)
20 Extreme Resonance Stones
10 Myth Experience
500 Fragments of the Ascension Device (Full 5 Star Copy)
Copyright @ 2025 Boarhat.gg