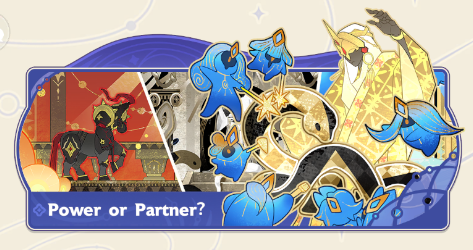
Stellar Path Guide
Stellar Path Guide for Go Go Muffin
Last updated: 10/9/2025

STELLAR PATH GUIDE
Overview
Stellar Path is a progression system unlocked upon reaching CC3 Level 35, after clearing stage 49-16.This new system introduces a new gear (Ascension) system, and ultimate skills (Paths) that when utilized properly, can boost the player's damage to another level. There are currently 3 ultimate skills (Paths), which can be modified with passives (Authorities) to fit the player's needs. This guide will go in-indepth and break down the main system into two parts. The Ascension and The Authority system, how to obtain these skills, and our recommendations on what to use and look for when summoning.
General Note:The Currency used to summon in this system (Infinity Prisms) does not provide Paper Plane Points when expended.
ASCENSION
The Ascension System is the first part of two introduced by Stellar Path. This system provides the players with additional stats similar to other progression systems (Cat Buns, Melomons, Mounts).
Ascensions
Ascensions are a gear type progression system, in which the player
levels their ascension to obtain stats and gain bonuses when
reaching certain levels / milestones.
There are currently 6 ascensions in the game. These ascensions are the
Corona, Ring, Chromaticity, Cavity, Core, Mantle. These ascensions provide
either HP, ATK, or DEF.
Below is a table of which Ascensions provide what stat.
| Stat | Ascensions |
|---|---|
| HP | Corona, Cavity |
| Attack | Ring, Core |
| DEF | Chromaticity, Mantle |
Ascensions can be upgraded by using Memory Essence and promoted with
Inspiration. These materials can be obtained from the Memory
Collector.
Every 25 levels, Ascensions provide an increase to material generation,
leading to faster levels. Every 50 levels, the player is given a stat
scaling based on another stat.
Ascensions cannot be leveled more than 25 levels apart, making it impossible
to truly focus one stat. Still, we recommend focusing on leveling ascensions
one at a time, in 25 level intervals. This allows the piece to hit the
next memory essence rate increase. It's recommended to prioritize ATK
> DEF > HP when leveling Ascensions.
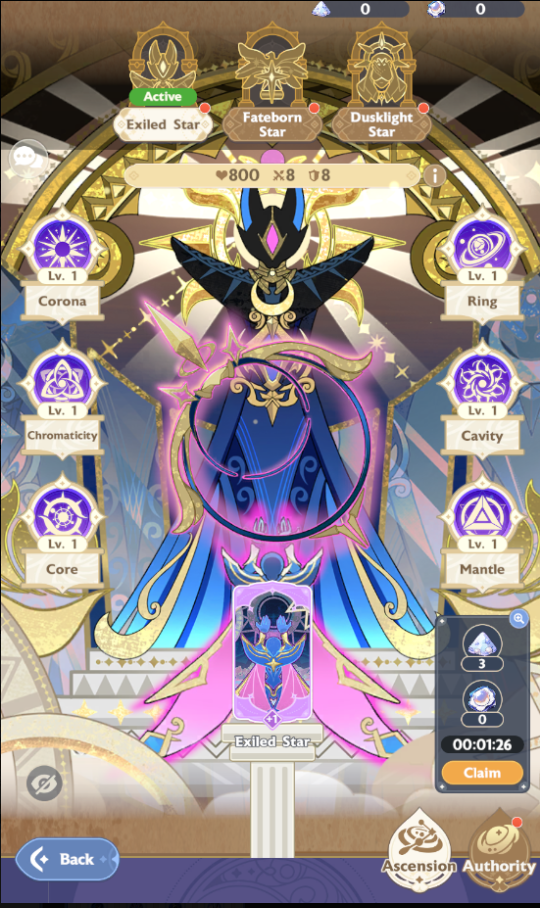
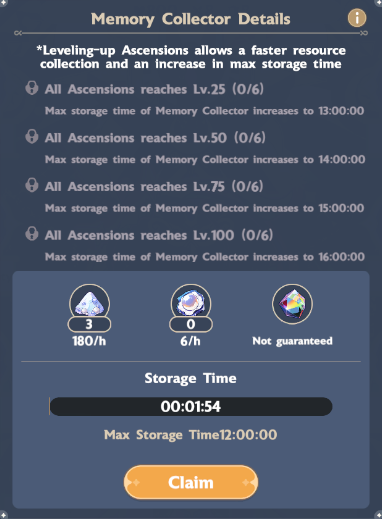
Memory Collector
The Memory Collector is a passive material generator, from which
Memory Essence and Inspiration can be obtained.
From level 1, the memory collector provides 30 of Memory Essence per
hour and 6 amount of Inspiration per hour. The rate of Memory Essence
that can be obtained can be increased by leveling the ascensions. At
every 25 levels, they increase the amount gained per hour.
The Memory Collector has a 12h collection limit, which is increased based
on the level of all ascensions. Below is a chart of the increasing collection
limit per 25 levels.
| Level (ALL) | Collection Limit |
|---|---|
| 0 | 12 Hours |
| 25 | 13 Hours |
| 50 | 14 Hours |
| 75 | 15 Hours |
| 100 | 16 Hours |
| 125 | 17 Hours |
AUTHORITY
The Authority System is the second part of the stellar path update,
giving players the ability to equip 1 of 3 ultimate skills (Paths)
that allows them to scale their damage to new heights. These Paths
can be modified by equipping Passives (Authorities) allowing for
even greater potential.
Authorities are split into two categories, generic and exclusive. Generic
can be equipped by all paths, while exclusive are only equippable to
their specific paths.
Currency
These unique Paths and Authorities are obtainable by summoning on
the Stellar Path Banner. The currency used to summon on this banner
are called Infinity Prisms, and can be obtained from various
sources. 1 Infinity Prism is equivalent to 1 summon.
There are several ways to obtain and accrue Infinity Prisms. They can
be obtained from the Memory Collector but are a bit inconsistent as it
requires luck. Two Prisms can be obtained from doing Dragon Bounty daily.
They can also be obtained from the rift shop, stocking 5 Infinity Prisms
costing 100 Rift Tickets per Prism. This resets weekly.
These following Infinity Prism sources will require spending Stellarite.
The Daily Hamster Shop restocks with 5 Infinity Prisms, costing 50 gems
per summon. The paid shop contains a pack that gives 20 Prisms for 2000
Stellarite, and can be bought twice. This pack resets weekly.
These following Infinity Prism sources are microtransactions, and cost
real life money. There are packs on release for limited time that range
from 5-30$ that will give:
5$ for 15 pulls
10$ for 30 pulls
30$ for 60 pulls
There is a pack in the paid shop that contains 30 pulls and 300 Stellarite
for 15$. This pack can be bought 5 times weekly.
There is a pack in the paid shop that contains 25 pulls and 60 Paper
Plane Tokens for 10$. This pack can be bought 2 times weekly per Paper
Plane Cycle.
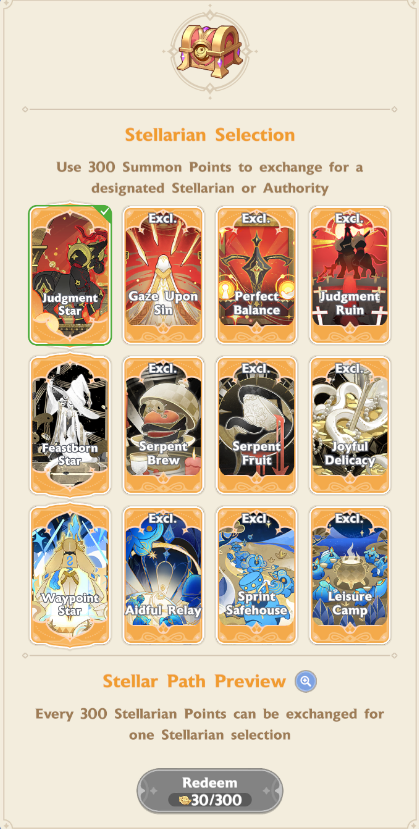
Pity System
All Paths and Authorities have Rare, Epic, and Legendary versions.
Similar to the Skill system and its summoning mechanics, players are
guaranteed to obtain 1 Legendary every 50 pulls.
Once the player reaches an accumulated 100 pulls in the Stellar Path
Banner, they unlock the Wishlist System. This wishlist allows players
to pick and choose their preferred legendary Path/Authority, having a
50% chance of obtaining the selected Path/Authority.
Obtaining extra copies allows the player to upgrade the star level of
the paths/authorities granting them extra effects. Any extra material
is turned into Egg of Birth and allows the player to redeem certain Authorities
from the Stellar Path Diviner Shop.
Paths and Authorities are available in their own section of the diviner
shop, ranging from rare to legendary. These cost 5000 Egg of Birth for
legendaries, 1200 Egg of Birth for Epics, and 200 Egg of Birth for Rares.
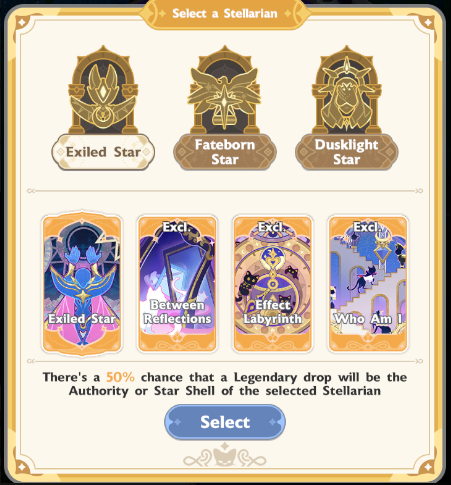
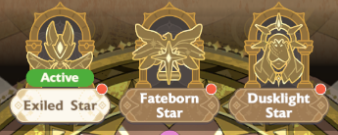
Paths
The Stellar Path system currently contains 3 Paths, essentially 3
Ultimate skills. These paths are the Exile, the Fateborn, and the
Dusk. There is no restriction between swapping Paths.
Damage applied by the Paths are called Star Shell Damage, and can be
modified by stats Pre-fixed by “Star Shell”. This damage scales from
the current DPS shown on the DPS chart upon skill activation.
The Exile Path summons a rain of arrows towards a target dealing 8 instances
of Star Shell Damage. Every cast, the path swaps between the [Azure Arrows]
and [Scarlet Arrows] bonuses. [Azure Arrows] - Increase damage by 30%.
[Scarlet Arrows] - Has a 30% chance to double damage.
This Path is theoretically the best during shorter fights, ending within
the first minute, as it does not require time to ramp up and has its
full bonus applied at the start of the fight.
The Fateborn Path condenses energy in an area and deals a single instance
of Star Shell Damage and is followed up by 7-11 extra hits per cast.
These extra hits increase the damage of the next cast by a certain amount.
This Path is theoretically great in medium length fights, as it allows
a slightly higher damage potential but is bound by rng.
The Dusk Path pierces through space, creating a massive rift in the area
dealing 6 instances of Star Shell damage. Every cast grans the player
a stack of [Dusklight]. [Dusklight] - Increases Star Shell Damage by
X% up to 5 stacks until the battle ends.
This Path is theoretically the best in long fights. Initially ineffective,
longer fights allow the Path to scale and increase in damage as [Dusklight]
is stacked.
Authorities
The Paths introduced above can be equipped with Authorities.
Authorities are passives that allow the player to modify and
increase the Star Shell Damage of these Paths.
There are two types of Authorities. Generic and Exclusive. Each Path
can equip 4 Generic Authorities and 2 Exclusive Authorities. Generic
Authorities can be equipped by all Paths. This also allows the player
to equip the same Generic Authority on all Paths at the same time with
no conflict. Exclusive Authorities' use are tied to their path and cannot
be equipped by other Paths. Each Path currently has 3 Exclusive Authorities.

Exclusive Authorities
| Authority | Skill Effect |
|---|---|
 | Star Shell Incarnation DMG increase 88%, but every stack of [Dusklight] reduces Star Shell Incarnation DMG by 20% |
 | Obtain 1 stack of [Dusklight] every 30s, Star Shell Incarnation DMG increase 7.5% |
 | Max stack of [Dusklight] increase by 3, and Star Shell Incarnation DMG Increase 13% |
 | Changed to: initially deals DMG for 7-11 times, accumulate the DMG dealt to the current target of these attacks, then deal a DMG of 107.5% of the accumulated DMG to the target area |
 | Each time Star Shell Incarnation deals DMG, there is a 30% chance to deal an additional DMG of 59% |
 | DMG of the first Star Shell Incarnation increase by 75%, and the following Star Shell DMG reduces by 50% |
 | Every 60s, the next Star Shell Incarnation DMG reduces by 26%, launching both [Azure Arrows] and [Scarlet Arrows] |
 | When dealing [Scarlet/Azure Arrows] DMG, next [Azure/Scarlet Arrows] DMG increase by 22% |
 | When dealing [Scarlet/Azure Arrows] DMG, there is a 25% chance to be considered as [Azure/Scarlet Arrows] DMG, and DMG increase by 22% |
Generic Authorities
| Authority | Skill Effect |
|---|---|
 | Star Shell Incarnation DMG increase by 31%, for each hit, reduce buff by -6% for 2s, stacks up to 10 |
 | Increase Star Shell Incarnation DMG by 45% within 60s after entering battle |
 | Increase the first Star Shell Incarnation DMG in battle by 75%, and reduce DMG of the following casts by 10% |
 | After battling for 90s, Star Shell Incarnation DMG increases by 30% until the end of battle |
 | For every 40s after the start of battle, Star Shell Incarnation DMG increases by 7.5%, up to 5 stacks, until the end of battle |
 | When casting Star Shell Incarnation, increase DMG of the first hit by 37% |
 | Star Shell Incarnation DMG increases 15% for 30s after casting Star Shell Incarnation , the buff is stackable but the duration is calculated independently |
 | When casting Star Shell Incarnation, increase the following DMG by 3.75% for each hit. This effect is stackable |
 | Star Shell Incarnation DMG increase by 37%, but the character's DMG reduces by 2% |
 | When casting Star Shell Incarnation, increase DMG of the next Star Shell Incarnation by 1.5% for each hit. This effect is stackable. |
 | Reduce Star Shell Incarnation cooldown by 3s, and increase DMG by 3.75% |
 | Increase Star Shell Incarnation cooldown by 10s, and DMG increase by 31% |
 | When Star Shell Incarnation is in cooldown, increase the DMG of the next Star Shell Incarnation by 0.6% for every second, max 60 stacks |
 | Character's DMG increases 2.2%, but Star Shell Incarnation DMG reduces 23% |
RECOMMENDATION
F2P
We recommend for everyone to pick up the daily Infinity Prisms from the hamster shop costing 250 Stellarite for 5 Daily. The paid shop contains a pack costing 2000 stellarites for 20 Infinity Prisms, and can be bought twice a week. Be advised that this pack is double the price of the prisms obtainable from the Hamster Shop (50 vs 100 Stellarite per summon), but allows the player another consistent source of Infinity Prisms. This pack has an equivalent cost to a normal 10x skill summon, coming in at 1000 stellarite per 10 summons. We recommend picking this up based on your current stash and income.
Spender
To those looking to obtain more Infinity Prisms and have the capacity to spend, there are currently three options. The first is the limited time pop up upon unlocking the Stellar Path system. These packs are high value and are cheaper than the 2nd alternative. As this is a step up pack, further packs can be unlocked when the previous is bought.
| Price | Summons |
|---|---|
| 5$ USD | 15 |
| 10$ USD | 30 |
| 30$ USD | 60 |
The first two packs are equivalent in value, while the 30 usd drops
the efficacy by half. We recommend to grab the first two packs.
The second option is a pack in the paid shop, costing 15$ for 30 summons
and 300 stellarite. This can be bought 5 times a week. This pack is the
same value as the third step from the limited time pack described above.
There third option is a pack in the paid shop that contains 25 pulls
and 60 Paper Plane Tokens for 10$. This pack can be bought 2 times weekly
per Paper Plane Cycle. This pack has even better value and even contribute
to Paper Plane Tokens. It's recommended to get this pack 2 times every
week if it aligns with Paper Plane goal.
BUILDS
Stellar Path DPS is heavily tied to character's own DPS between last
and current cast. So the build is tied to character's type of DPS,
burst or ramping.
Exiled Star is burst oriented and heavily favored for short term fight.
Fateborn Star is suited more for medium length fight below 4 minute.
Dusklight Star is more suited for long term fight above 4 minute.
That said, according to test, Exiled Star generally have roughly similar
DPS even for mid and long term fight, therefore it's recommended to focus
on Exiled Star instead. The further we go, burst is
better for carrying more content, while mid to long fight is limited
in content for it to be worth investing in.
Generic Authorities are interchange-able between each other since it's
dependant more on star-up and rarity rather than specific card. Interchangeable
card will be listed on the build below.
Note:
Class does not matter in Stellar Path, everyone can use same build.
Exiled Star Ramping Build
STAR SHELL EXCLUSIVE AUTHORITY
 Consistent -> RNG
Alternative
Exiled Star Burst Build
STAR SHELL EXCLUSIVE AUTHORITY Fateborn Star Build
STAR SHELL EXCLUSIVE AUTHORITY
 Cooldown Modifier
Cooldown Modifier
Dusklight Star Build
STAR SHELL EXCLUSIVE AUTHORITY
 Cooldown Modifier
Cooldown Modifier
Disclaimer
The current translations of skills and effects in-game do not directly reflect how they work, and how they are described to work from different versions of the game (CN, TW). These builds are tested manually and are subject to change based on the most recent findings.
GENERATION 2
Generation 2 Stellar Path is unlocked on level 28, upon clearing stage 85-4. This introduces 3 completely new authority, exclusive authorities, and 4 new general authority. Generation 2 uses compeletely different materials to upgrade Memory Collector, using [Shiver] for promotion, and [Instinct] to level up. Generation 2 authority also uses completely new currency to summon authority, namely [Infinite Crossroad].
Generation 2 Stellar Path have similar wishlist as generation 1, but now comes with addition of a pity selector every 300 pulls. Players are only able to choose generation 2 Path and Exclusive Authority from this.
Paths
Below are the 3 main paths of Generation 2 Stellar Path :
| Stellarian | Skill Effect |
|---|---|
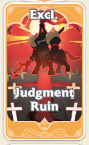
 | Throw a spear at the target and summons the [Scale of Judgement], dealing Star Shell DMG of 41.5% for 6 times. [Scale of Judgement] has an equal chance to lean to either left or right, increasing DMG by 50% respectively against enemies with HP above or below 50%. |
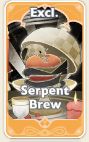
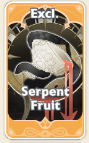
 | Summon a Feastborn Serpent in the target area, dealing 21% Star Shell DMG 4 times. Applies [Gluttony Erosion] to the targets, dealing 1.5% Star Shell DMG (DoT) every seconds for 20 seconds. |
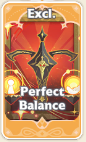
 | Continuously generates spatial portal in the target area, randomly dropping massive objects to deal 6 Star Shell DMG with a multiplier of 37.5%, and increases the character's Healing Effect and all DMG Resist by 5% and 3% respectively, for 40 seconds. |
Exclusive Authorities
| Authority | Skill Effect |
|---|---|
 | Reduce cooldown for Star Shell Incarnation by 10 seconds, reduce DMG by 30%, for every 3 casts of Star Shell Incarnation, increase DMG of next attack by 150%. |
 | Every 60 seconds, the next summoned Scale would be a [Perfect Scale], which is considered to lean to both left and right, and the DMG increase by 22%. |
 | Increase Star Shell Incarnation cooldown by 30 seconds, DMG of the first 4 casts of Star Shell Incarnation increases by 150%. |
 | Direct DMG from Star Shell Incarnation is reduced by 20%. [Gluttony Erosion] DMG is increased by 88%, and its duration is extended by 20 seconds. |
 | Star Shell Incarnation immediately deals all remaining DMG from [Gluttony Erosion] as a single independent hit. This hit my crit and deals 460% increased DMG. |
 | Increases [Gluttony Erosion] DMG by 230%. Its DMG Interval is reduced to 10% of original, but the total number of DMG instances remains unchanged. |
 | Increases Star Shell Incarnation DMG by 75%; after casting Star Shell Incarnation, if the character is the Boss's atack target, reduces DMG taken by allies by 50% for 5 seconds, and applies [Self Discipline]; this DMG Resist effect is equal to [Radiant Barrier]. |
 | Star Shell Incarnation DMG increased by 75%. After casting Star Shell Incarnation, if targeted by the boss's attacks, every 1% of Star Shell Crit and Crit DMG converts to 0.05% DMG Resist. If equipped with [Invoker], then the effect will instead be: increases Healing effect by 0.07% for 40 seconds. |
 | Star Shell Incarnation DMG increased by 75%. After casting Star Shell Incarnation, if the character is equipped with [Invoker], all team members recover 20% of their Max HP every 0.5 seconds for 8 seconds, and grants [Self Discipline]. This healing effect could be considered same as [Divine Healing]. |
General Authorities
| Authority | Skill Effect |
|---|---|
 | Increases Star Shell Incarnation DMG by 15%. For every 1 second the actual cooldown of Star Shell Incarnation is greater or less than initial cooldown, its DMG is additionaly increased by 2%. |
 | Reduces Star Shell Incarnation DMG by 9%. Star Shell CRIT and Crit DMG are increased by 20% and 30% respectively. |
 | Increases Star Shell Incarnation DMG by 37%. Casting Star Shell Incarnation within 10s of dealing Star Shell Incarnation DMG grants an additional 20% DMG Boost. |
 | Casting Star Shell Incarnation deals 37% of Star Shell DMG to all enemies. |
GENERATION 2 BUILDS
For DPS, currently the clear winner is Judgement Star path. But now, there are options for other role, Healer and Tank can go with Waypoint Star. Judgement Star completely eclipse Exiled Star even at Gold 5, so feel free to switch right away.
Judgement Star Dragon Build
STAR SHELL EXCLUSIVE AUTHORITY Better with Higher Star
Judgement Star WoH Build
STAR SHELL EXCLUSIVE AUTHORITY Tank Build
This tank build essentially act as Radiant Barrier when casted and boost DMG Resist for the tank.
STAR SHELL EXCLUSIVE AUTHORITY The other 3 authorities are optional.
Healer Build
This healer build essentially act as Divine Healing and boost the player's Healing Effect. Player must equip [Invoker] passive in order for it to work.
STAR SHELL EXCLUSIVE AUTHORITY The other 3 authorities are optional.
Copyright @ 2025 Boarhat.gg