Molten Seal Dragon (EoB) Guide
Molten Seal Dragon (EoB) Guide for Go Go Muffin
Last updated: 21/5/2025

MOLTEN SEAL DRAGON (EOB) GUIDE
OVERVIEW
Echoes of Battlefield is a time limited Guild-Event that allows
players and their guilds to test their coordination, patience, and
mechanics. This second round of Echoes of Battlefield reintroduces
Molten Seal Dragon.
Players in this gamemode are able to freely pick and swap their class
of choice at any point within the event. This event is the first to feature
Fixed Level Characters, meaning all Players and Classes sport the same
stats while in the event stage. This lets players experience other classes
and allows for more in-depth strategizing.
The event also features a new system that we will coin “Bonus Buffs that
allows players to gain extra effects/modify their skills to their advantage.
All in all, these changes allow a fair competitive environment while
expanding it strategically.
In this quick guide we'll be breaking down the obtainable rewards, Optimal
Class Compositions, Builds, Bonus Buffs, and the boss' mechanics.
LEADERBOARD & REWARD
There is a great bounty and glory for those who want to compete in
this game mode. There are the rewards which come from clearing for
the first time, and Glory for those wanting to chase the
Leaderboards.
Completing this event for the first time awards the player with 500 Stellarite,
10 CC4 Skill Summons, 3 Melomon Strings, 3000 Basic Resonance Stone,
and 1000 Ringed Leaf.
During the first and subsequent clears, The player is eligible to be
put into two Leaderboards. The Guild Leaderboard, and the Adventurers
Leaderboard. Both of these leaderboards are cross-server, based within
the same region.
Guild Leaderboard
First and foremost, players are only eligible to rank within the
Guild Leaderboard when all participating party members belong to the
same Guild. Only the fastest clear time is registered within the
Guild Leaderboard, representing their Guild.
Guilds ranging in the top 1-200 are rewarded with cosmetic rewards. These
cosmetics have small distinctions based on the specific ranking of the
party. These changes appear in brackets listed below.
| Rank | Reward |
|---|---|
| 1-10 | Guild Banner (Peerless Climber), Chat Frame (Roar of Lions) |
| 11-50 | Guild Banner (Pierce the Firmament, Chat Frame (Tide of Rage) |
| 51-100 | Guild Banner (Tempest of Blades), Chat Frame (Bloodbound Glory) |
| 101-200 | Guild Banner (Valor's Anthem) |
| 2 Parties Cleared Challenge in Guild | Guild Banner (Iron Heart) |
Adventurers Leaderboard
Within the Adventurers Leaderboard, all parties participating, whether they be in the same guild or not, are eligible to be entered. This leaderboard does not provide any rewards, though acts as a record for those who have cleared before.
Optimal Ringed Leaf Usage
The Ringed Leaf can be used in the Event's Shop, items found at the bottom of the page. There are 4 options in this shop. Recharge Crystals, Melomon Shard Selector Chests, Imagined Reality, and Mythic EXP. We believe the best use of this currency would be to grab the Melomon Shard Selector Chests. These chests will contribute to the accumulation of Demon Hound shards in preparation for PP24 (Server Week 25), the Gen 2 Melomon Exchange. The player is able to obtain 4 extra shards when all currency is used towards this goal. The other rewards, although great, are more accessible given their nature.
CLASS COMPOSITION & BUILDS
Precursor & Team Composition
Before Heading into battle, having a proper team composition and the
right skills equipped is paramount when trying to clear this
content. All characters and classes in this gamemode are CC1 Level
55, and have a predetermined Pet / Melomon. Players are able to
adjust their Tactical Skills and Passives to maximize their damage.
In terms of Team Compositions, we recommend running with 1 Healer, 1
Tank, and 2 of any DPS. This boss requires Healers for their use of Purification
to cleanse the DoT and Divine Healing to survive boss's wipes, while
the tank's purpose is to absorb the bosses' high single target damage
without getting one shot.
All players come pre-equipped with Turning Point allowing for some mistakes
while learning the mechanics.
Builds
Every Party needs to be properly equipped to deal with the barrage
of mechanics Molten Seal Dragon introduces. The 2 core elements
required are Cleanse, Divine Healing.
Cleanse is required to deal with DoT is provided by the Healer. Divine
Healing is used to survive AoE wipes.
Bonus Buffs
Every Class Type (Tank, Healer, and DPS) can equip 1 of 3 special
buffs that can modify skills to provide extra effects, or provide
buffs when certain conditions are met. These bonus skills will aid
greatly with clearing, making runs much faster / safer when utilized
properly.
Below is a list of Bonus Skills each Class Type can equip.
| Name | Effect |
|---|---|
| Eternal Guardian | The Guardian effect can be applied to all allies, Upon casting Guardian, gain a shield equal to 25% of the Max HP, but reduce DMG dealt by 50% for 10s. |
| Precise Counter | Stalwart Shield’s duration is reduced to 2 seconds. If Stalwart Shield is broken during this duration, deals True DMG equal to 1.2% Max HP to enemies. |
| Assault Signal | During the duration of Banner of Courage, increase all allies’ ATK by 5%. For every ally that casts a team-wide buffing skill in this duration, all allies’ ATK is further increased by 20%, but also increases the cooldown of Banner of Courage by 5s. |
| Name | Effect |
|---|---|
| Light of Redemption | While Self- Discipline is active, when an ally receives a lethal hit, survives with 1 HP and gain a shield that absorbs damage equal to 30% of their Max HP for 15 seconds. This effect can only be triggered once per instance of Self-Discipline, and when activated, reduces the DMG dealt of the ally affected by this skill by 40%, persistent until the end of Self-Discipline. |
| Emergency Rescue | If afflicted by cleansable debuffs, cleansing it within 1.5s increases all allies’ DMG dealt by 8% for 30s. But if cleanse after 2s, then reduces all allies’ DMG dealt by 15% for 30s |
| Holy Repulse | When providing Healing Effects to allies with more than 90% HP, deal True DMG to all enemies equal to 800% of the healing amount. |
| Name | Effect |
|---|---|
| Two-Way Ability | Dealing DMG to enemies has a 10% chance to grant a shield that absorbs DMG equal to 25% of Max HP. This effect can trigger once every 10 seconds and lasts for 10s. While this shield is active, reduces the characters’ DMG dealt by 30%. |
| Critical Strike | When the Enemy have shield, casting Interrupt skills to deal true DMG by 0.4% of the target's max HP after 1s, and increase the party's DMG dealt by 35%, lasting 30s. |
| Vengeful Wrath | Every 10 seconds, increase all DMG dealt by 2% and DMG taken by 5%. Up to 10 stacks |
Class Build
With all of these factors at play, below are builds that fulfill the required mechanics while maximizing damage. Keep in mind that only one DPS will need to carry interrupt so be sure to coordinate within the party.
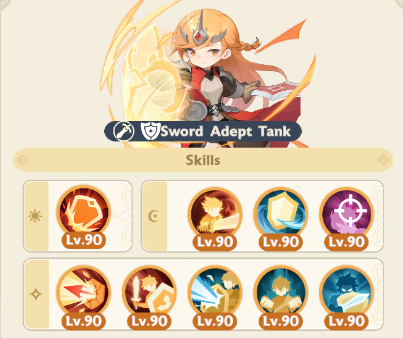
Tank
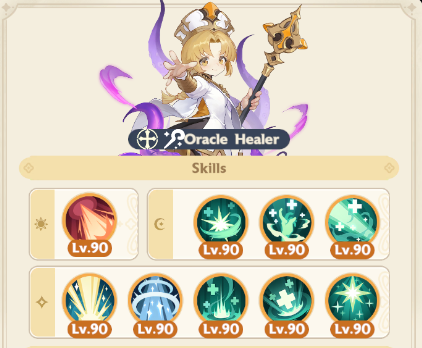
Healer
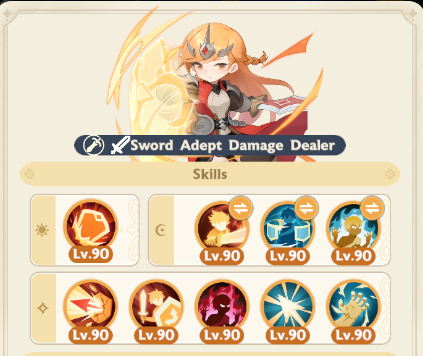
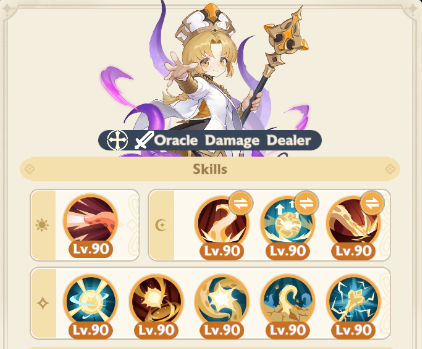
Swordbearer (DPS)
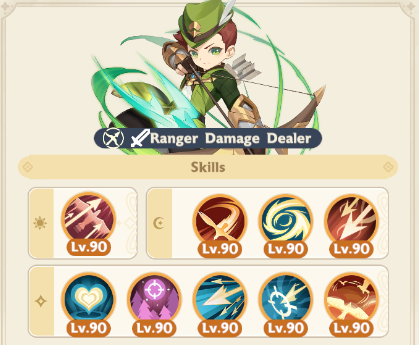
Wayfarer
Scholar
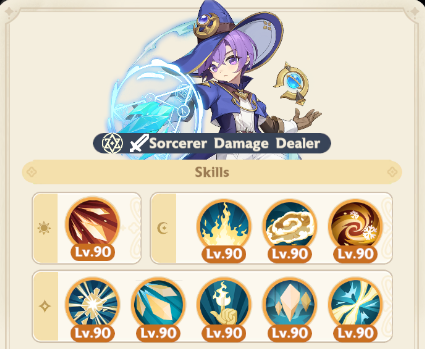
Shadowlash
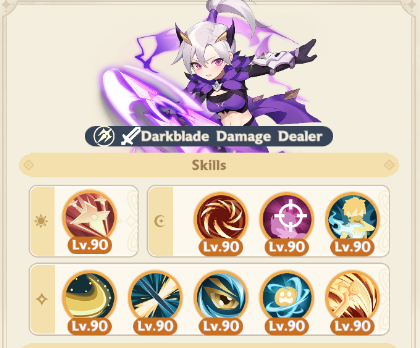
Acolyte (DPS)
Role Summary
Below are the recommended Skill for the roles :
| Role | Mandatory Skill | Bonus Buff |
|---|---|---|
| Tank | Stalwart Shield | Precise Counter (Buff 2) |
| DPS | - | Vengeful Wrath (Buff 3) |
| Healer | Purification, Restoration, Divine Healing | Holy Repulse (Buff 3) |
When optimizing for damage, we recommend running the Mage and Wayfarer as the DPS options. Shadowlash also good but a bit RNG with higher ceiling, while Wayfarer is more consistent.
MOLTEN SEAL DRAGON (BREAKDOWN)
Molten Seal Dragon has two phases, both of which have unique skills that the players will have to familiarize themselves with to triumph against this boss. These movesets are explained in the order that the player will encounter them, leading to a smoother learning experience.
General Information
In line with setting up for success, this section will be explaining
general strategies before going in depth into the bosses' mechanics.
This allows everyone on the party to be on the same page.
The boss arena contains three distinct zones of combat, with Sun, Moon,
and Star symbol designating the zones. For ease, we recommend designating
Sun as the "Safe Zone" for future references.
Phase 1
Cursemark
The Dragon reveals rotating rings around its body, indicating
where the explosion gonna occur, dealing massive damage to marked
sectors.
Players just need to avoid the tile marked with the symbol, failing
to do so will give stackable increasing DMG Taken.
Darkness Surge
The dragon applies DoT everyone that deals DMG every 2 second,
lasting for 15 seconds.
Healer need to cleanse this immediately, save Purification for this
during Phase 1.
Dark Gaze
A single target continuous damage beam that deals increasing DMG
the longer it channels. Players can break this by dealing 0.6% Max
HP.
Tank should use Stalwart Shield during this.
Aether Blast
An AOE DMG to everyone, dealing 20% DMG.
This skill doesn't deal any big DMG and can be ignored.
Phase 2
Phase 2 of Molten Seal Dragon have different mechanics from Phase 1 and require more attention.
Dragon Liberation
Immediately casted upon transitioning to Phase 2, dealing huge
continuous DMG to wipe everyone.
Healer need to save Divine Healing for this to survive this move.
Corruption
Marks every player with a symbol on top of their head, indicating
where they should be.
Players need to move to their respective tile, failing to do so will
trigger AOE explosion on their tile.
True Flame
A rotating "Flame Thrower" that deals very high DMG. Can rotate
either clockwise, or counter-clockwise, indicated by arrows around
its body.
Players need to gather behind where the dragon going to go and follow
the dragon immediately to avoid getting burned.
Scorching Earth
A very high Single Target DMG to current Target. Staying in same
tile for more than 4s will trigger a big explosion on the tile.
Tanks need to use Stalwart Shield on this move, and keep moving around
to avoid exploding their teammates.
Apocalypse
A continuous AOE DMG capable of wiping the team.
Healer need to save Divine Healing for this to avoid the wipe.
Energy Depletion
Casted immediately after end of Apocalypse, during this move the
dragon takes 100% more DMG for 10s and does nothing.
It's recommended to save Awakening and skills for this move in order
to deal higher DMG.
Multi Chaos Infusion
The boss marks 2 random players, indicated by smoke around them,
and then another 2. An explosion will occur after few seconds and
getting hit by two explosions in a row means instant death.
To avoid this, we recommend everyone staying in Safe Zone (Sun), and
first two marked players go left/right accordingly. After explosion,
the last 2 players go left/right accordingly to swap with them.
Copyright @ 2025 Boarhat.gg