Evangelion Collab Guide
Evangelion Collab Guide for Go Go Muffin
Last updated: 19/6/2025

EVANGELION COLLAB
OVERVIEW
Neon Genesis Evangelion, a beloved cult classic (for inflicting
depression) is Go Go Muffin’s first Anime Collaboration. This Collab
Features Costumes from notable characters within the franchise such
as Shinji and Asuka, bringing them to life in GGM. This collab also
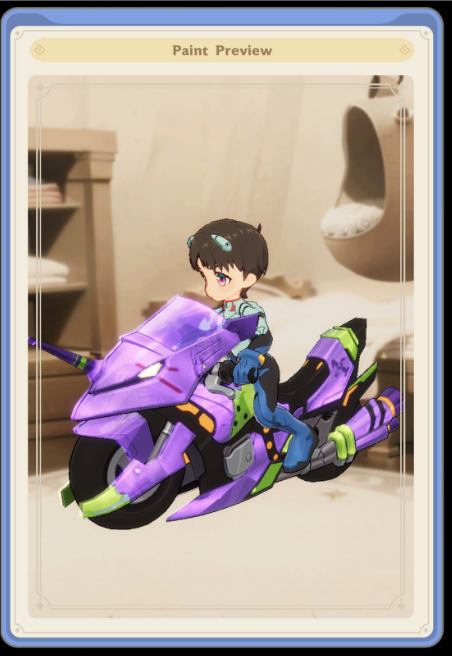
features a collab exclusive mount paint in the style and color of
Evangelion Unit-01, drifting and roaring in motorcycle form.
This Collab has multiple EVA- themed events that contain great rewards
to those that participate. This guide aims to inform and give advice
on all aspects of this collaboration, its duration, and the content the
player will encounter within scope of the collaboration.
COLLAB EXCLUSIVE COSTUME
Pulling Mechanic
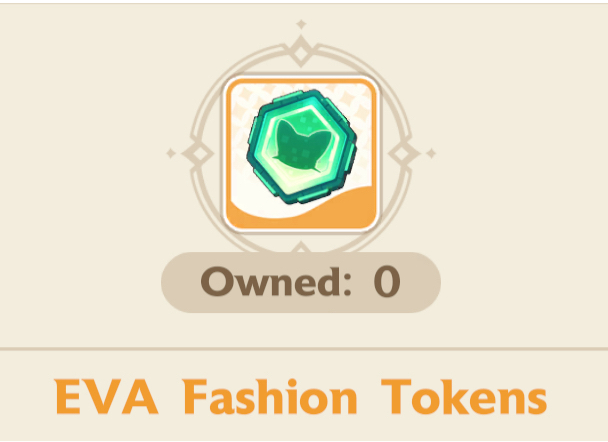
Shinji’s Plugsuit and Asuka’s Plugsuit Costume Banners use a special currency named ‘EVA Fashion Tokens’. Previously collected Fashion Gacha Coupons are not usable for these costumes. These Costume Banners are available from 06/18 to 07/02
These costume banners guarantee a non-duplicate item upon draw,
allowing the player to collect all items within one of the
aforementioned costume banners in 8 draws. This pity system is not
shared between all current and future Evangelion Costume Banners.
The first draw is free for both Costume Banners, guaranteeing a free
3-day timed trial for their respective costume sets. Subsequent draws
slowly increase in price, costing 4, 4, 6, 8, 8, 10, and 10, totalling
50 ‘EVA Fashion Tokens’for those looking to collect a full set of a costume
banner.
Spending Advice
The highest value EVA fashion Token pack within the shop is the one
valued at 7 USD, providing 15 Tokens’ per purchase, which comes at
2.14 tokens per dollar. This pack can only be bought twice per
costume banner, meaning players will need to buy the second highest
value pack to obtain the full set. The pack in question is the 5 usd
Token pack, providing 10 Tokens per purchase, and comes at 2 tokens
per dollar.
To fully unlock a costume banner, players will need to purchase both
of the 7 USD token packs, and 2 of the 5 USD token packs. This will cost
the player a total of 25~ USD. These costume banners have independent
packs within their ‘Special Shops’, which allows the player to get all
plugsuits at the same calculated price.

When the costume banners end, all EVA Fashion Tokens are reclaimed and are converted to Stellarite, at a rate of 30 Stellarite per Token. Use these tokens when bought, as soon as possible.
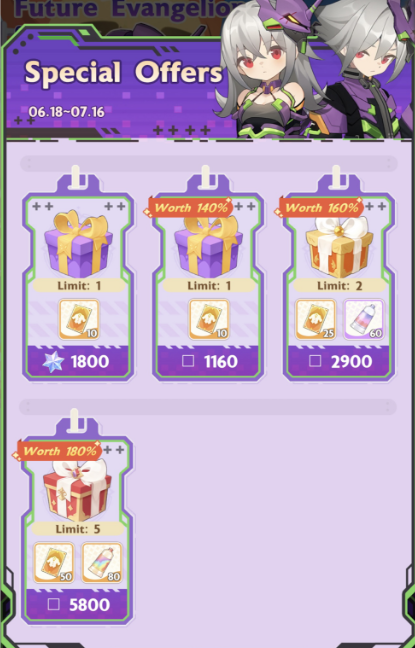
Future Evangelion Costume Set
The Future Evangelion Costume banner uses ‘Fashion Gacha Coupons’,
which could be previously obtained and saved from older costume
banners. The new ‘EVA Fashion Tokens’ are not usable within this
banner. This Costume Banner is available from 06/18 to 07/16
This costume banner guarantees a non-duplicate item upon draw, allowing
the player to collect all items within this costume banner in 10 draws.
The first draw is free within this costume banner, guaranteeing a free
3 day timed trial of this costume set. Subsequent draws increase in price,
costing 4, 4, 4, 6, 6, 8, 8, 10, and 10, totalling 60 Fashion Gacha Coupons.
Spending Advice
Players will need a total of 60 Fashion Coupons to unlock the full
costume set and the accoutrements.
Starting from scratch, if the player has no Fashion Coupons saved up
from previous events, the player will need to spend 100 USD and 1800
Stellarite within the Costume Set’s Special Shop.
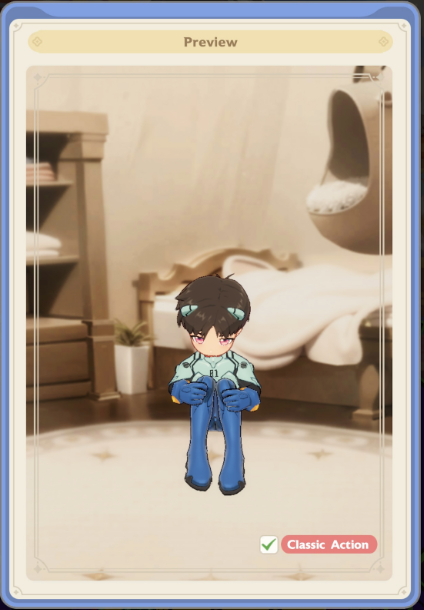
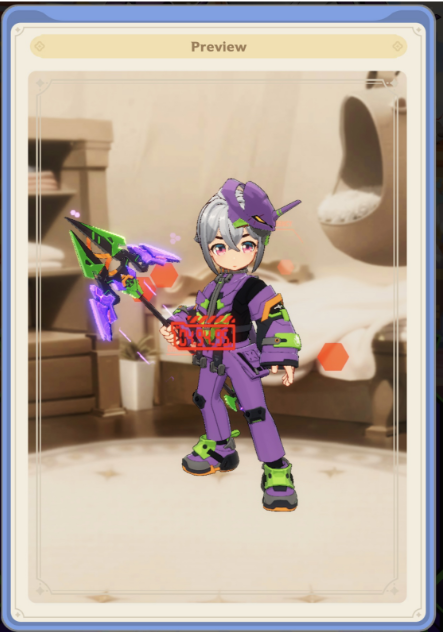
Shinji's Plugsuit (18 June to 2 July)
A collab exclusive costume set with 8 total pieces to collect. This set features Shinji’s Plugsuit (Complete with his Bowlcut Hairstyle, Hair Accessories, and Plugsuit.), including a unique trail & pose. Complete with a Shinji color-themed Background, Frame, Avatar and Medal. This costume set is only equippable by Male Characters, and will not transform into Asuka’s Plugsuit when the character’s gender is changed.
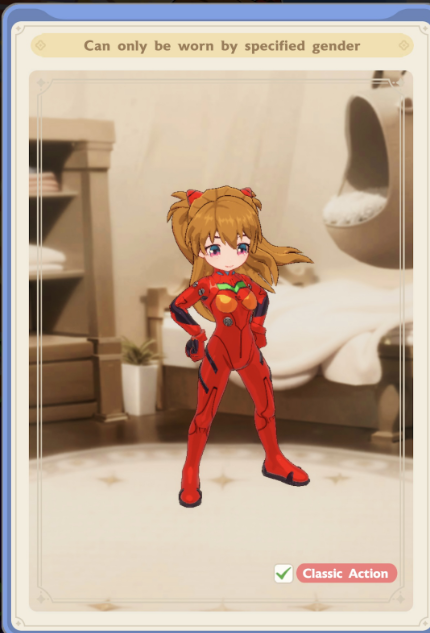
Asuka's Plugsuit
A collab exclusive costume set with 8 total pieces to collect. This set features Asuka’s Plugsuit (Complete with her Pig-tail Hairstyle, Hair Accessories, and Plugsuit) including a unique trail & pose. Complete with a Asuka color-themed Background, Frame, Avatar, and Medal. This costume set is only equippable by Female Characters, and will not transform into Shinji’s Plugsuit when the character’s gender is changed.
Rei's Plugsuit
A collab exclusive costume set with 8 total pieces to collect. This set features Rei’s Plugsuit (Complete with her Pixie Cut Hairstyle, Hair Accessories, and Plugsuit), including a unique trail & pose. This is complete with a Rei color-themed Background, Frame, Avatar, and Medal. This costume set is only equippable by Female Characters and will not transform into Shinji’s or Kaworu’s Plugsuit when the character’s gender is changed.

Kaworu's Plugsuit
A collab exclusive costume set with 8 total pieces to collect. This set features Kaworu’s Plugsuit (Complete with his Anime Free-Flowing Hair Cut, and Plugsuit), including a unique trail & pose. This is complete with a Kaworu color-themed background, Frame, Avatar, and Medal. This costume set is only equippable by Male Characters and will not transform into Asuka’s or Rei’s Plugsuit when the character’s gender is changed.

Future Evangelion Costume Set
A collab exclusive costume set with 10 total pieces to collect. This set features Evangelion Unit-01 color schemes for the Weapon, Hair Style, Head Piece, and Costume. This costume set also features a unique EVA-themed trail, Avatar, Frame, and a background of the iconic Tokyo-3, the main setting of Neon Genesis Evangelion.
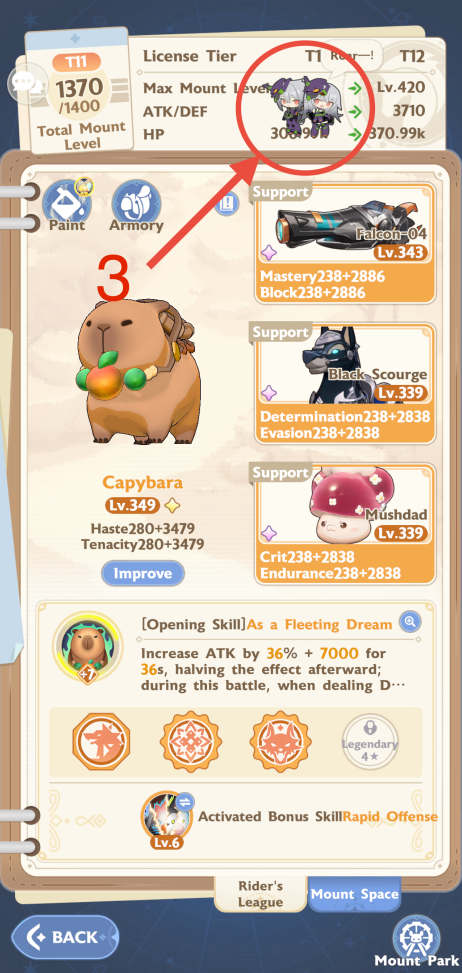
Mount Paint
A color scheme inspired from the original Evangelion Unit-01, the
first non-prototype Evangelion Mecha Unit. This mecha is used by the
main character, Shinji Ikari, both in the anime and other
Evangelion-related media.
This Mount Paint is available for two weeks, from 06/18 to 07/02. This
Mount Paint costs 15 USD or the equivalent in the player’s local currency.
Mount Paint (Part 2)
This bike closely resembles Rei's Plugsuit with her signature white
and orange accents.
This Mount Paint is available for two weeks, from 07/02 to 07/16. This
Mount Paint costs 15 USD or the equivalent in the player’s local currency.

EVENT
High Energy Alert
High Energy Alert is a Hide and Seek / Where’s Waldo type of
activity where the player must find a hidden character within the
game, prompting interesting dialogue and more importantly, unlocking
various rewards. The locations for these characters vary greatly and
are slowly unlocked throughout the duration of its event.
The event lasts 14 days, from 06/18 to 07/02. The player will need to
find a total of 8 Hidden Characters, and will in turn receive 8 rounds
of rewards for their efforts.
Day 1
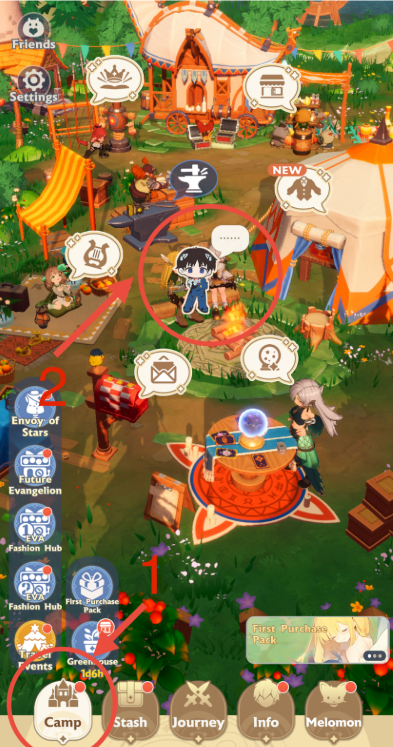
Target: Shinji (Projection). Location: Campgrounds, Near Campfire.
Day 2
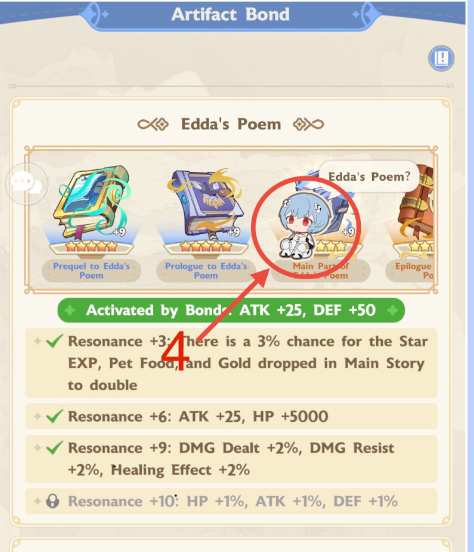
Target: Rei (Projection).Location: Info Tab, Artifacts, Artifact Bonds
Day 3
Target: New Outfit. Location: Info Tab > Rider’s League > Top of the menu
Day 5
Target: The 6th Angel (Projection). Location: Campgrounds > Artifact Hunt > Darkmoon Forest

Day 7
Target: Asuka (Projection). Location: Campgrounds > Shop > Hamster's Good

Day 9
Target: Mount (Projection). Location: Info -> Mount

Day 11
Target: The 10th Angel (Projection). Location: Chat -> Recruit (Enlarged)

Day 13
Target: Kaworu (Projection). Location: Camp ->Path of Heroes -> Hero Chronicle


REWARD
Below is a list of Resources and Costume Pieces the players will obtain throughout the duration of this event :
- 300 Stellarite
- 5 Legendary Melomon EXP
- 5 Melomon Summoning Selection (Gen 1 or Gen 2)
- 2 Mythical Mount - Benevolent Beast Point Cards
- Pen Pen - Tail Costume Piece
- 20 Recharge Crystals
- 500 Runes / Rune Characters
- 300 Stellarite
ANGEL ASSAULT (The 4th Angel)
Angel Assault is a ‘rotating boss’ event similar to the weekly
slimes and mermaids. This Angel Assault features The 4th Angel, an
EVA-themed boss that features unique mechanics and a new arena
format. Players will have to move, dodge, and take advantage of the
enemies attack patterns to buff themselves and deal massive damage.
This mode’s rewards are tied to the party’s capability to deal damage,
and it is highly beneficial to work with its mechanics to maximize resource
gain.
This event lasts 7 days, from 06/18 to 06/26. Angel Assault features
many rewards, both unique and useful. We recommend clearing this content
at least once a day as its rewards reset daily.
General Strategy
This boss fight’s arena is a 3x3 grid at which the boss will throw
sector wide damaging attacks. Players are able to freely move around
this arena.
The 4th Angel does not have many active attacks, rather relies on field
effects and passive chip damage to take down the party. ‘Angel Invasion’
passive deals minor Burn DMG to all units, and when set up by The 4th
Angel, ‘A.T. Field’ passively damages a player within its sector. (Sectors
marked in yellow).
The 4th Angel deploys two ‘Active’ Attacks. ‘N2 Bomb’ and ‘Light Lance
Smash’.
Light Lance Smash is a delayed attack that covers 6 of 9 sectors
within the Arena. This attack can cover the Upper, Lower, Left, or
Right side of the Arena. After a brief charge up time, the boss
deals massive damage to whoever is caught within the red ring.
Players are advised to move out of the way when possible.
N2 bomb is a random explosion that happens from the player’s character
model. The player is marked with a map and a timer of when the explosion
will go off. Players can see where the explosion will go and direct this
explosion through the glowing white marks on the floor whenever marked.
When these explosion marks are lined up with an A.T. Field, no damage
is dealt within the sector, and the party’s Sync Rate is increased.
Maximizing damage within this fight revolves around building up the “Sync
Rate”. The Sync Rate Bar can be seen on the left hand side of the screen.
For every 1% Sync Rate, the party’s DMG is increased by 100%. This can
go up to 200%, but will naturally decay when the sync rate exceeds 100%.
Players will want to line up their explosions towards sectors that have
an A.T Field to cancel the damage and increase the team’s Sync Rate.
Team Composition
This boss fight features purely Sector-wide damaging moves, meaning
players will not need to run a Tank within the party.
We recommend running full dps with a full healer to comfortably clear
this stage. Healers can opt to run hybrid but may lack the healing necessary
to sustain the party.
Healers and passive healing effects enjoy a greatly increased healing
effect buff within this stage.
Move Set
A-T Field
Upon finishing its cast, the 4th Angel will summon yellow damaging zones within random sectors, dealing minor DMG to units within the field.
N2 Bomb
Upon finishing its cast, the 4th Angel will summon yellow damaging zones within random sectors, dealing minor DMG to units within the field.
Light Lance Smash
Randomly swings the light lance left/right or forward/backwards, dealing massive Sector DMG.
Angel Invasion - Passive Effect
Continuously Deals minor Burn DMG to all units.
Repair Boost - Passive Effect
All units gain an innate healing boost within this event, greatly increasing healing effects.
Rewards
There are various rewards waiting for players that participate in this Event. The breakdown is as follows ; First-time Clear Shared Loot Rewards, Nerv’s Approval Milestones, and the Defensive Fortification Supplies gained from dealing damage to the boss.
Shared Loot Rewards
This reward can only be claimed once per event, giving the player a total of 1000 Stellarite based on the highest cleared stage within the player’s CC and Level Bracket. This reward is granted to all players within that bracket and encourages players to be the first to clear high difficulty stages for bragging rights.
Nerv’s Approval Milestones
When players collect Fortification Supplies from clearing ‘Angel
Assault’, the amount of Fortification Supplies is tracked by the
game, and players are given special rewards based on the total
amount the player has received within the event’s duration.
Below is a list of rewards and costume pieces the players can claim by
reaching certain milestones.
Obtain 5 Defensive Fortification Supplies - ‘Angel Mask’ Head Costume
Piece
Obtain 10 Defensive Fortification Supplies - 300 Stellarite
Obtain 20 Defensive Fortification Supplies - ‘Nerv Mug’ Tail Costume
Piece
Obtain 25 Defensive Fortification Supplies - 300 Stellarite
The Fortification Supplies are consumable, and players will gain various
resources from opening these consumables. Below is the list of Rewards
the players can obtain and their chances.
| Reward | Chance |
|---|---|
| 500 Stellarite | 1% |
| 100 Stellarite | 1.5% |
| 20 Stellarite | 12% |
| 10 Stellarite | 30% |
| 100 Runes | 1.5% |
| 50 Runes | 4% |
| 10 Runes | 50% |
FINAL ECHO (The 6th Angel)
The Final Echo of the 6th Angel (or the Final Echo for short), is a
‘rotating boss’ event similar to the weekly slimes and mermaids.
This Final Echo features The 6th Angel, an EVA-themed boss that
features mechanics similar to the singing mermaids. Players will
have to move dodging bombs and to collect buff orbs on a piano-esque
tile arena.
This mode’s rewards are tied to the party’s capability to deal damage,
and it is highly beneficial to work with its mechanics to maximize resource
gain.
This event lasts 7 days, from 07/02 to 07/10, with a 1 day grace period
to give players time to receive rewards from the event.
Final Echo features many rewards and cosmetics. We recommend clearing
this content at least once a day as its rewards reset daily.
General Strategy
The fight takes place in a 1x5 arena where the players will have to
move left and right to dodge and collect two different unique buff
orbs to increase the whole party’s damage.
The boss will spawn 3 types of orbs. Damaging orbs, Blue Buff Orbs, and
Yellow Buff Orbs.
These orbs will spawn in front of the players, slowly making their way
down the arena until meeting the area where players can move.
Damaging orbs are quite simple in nature, and will damage the players
when making contact, if the orb and a player is in the same tile.
Every player is marked with a random orb above their head, indicating
blue or yellow. Players that collect the same colored Orbs will increase
the party’s Sync Rate, increasing overall damage.
Sync Rate is the bar on the left. The more this bar is filled, the higher
the damage buff that is given to the entire party. This bar can be filled
up to 200%, but slowly decays once the party gain sync rate above 100%.
Later in the fight, the boss has two additional special attacks, Charged
Particle Cannon, and A.T. Field Shield.
Charged Particle Cannon Fills the board with charging lasers, the players
will have to dodge while these continuous charging lasers are firing
at them.
The A.T. Field Shield spawns during the second half of the fight, after
a charged particle cannon has occurred. This field shield blocks all
Damaging and Buff Orbs, leaving players with a tighter space for collecting
buffs.
Team Composition
This boss fight features purely dodgeable moves, meaning parties can
theoretically run this boss without any healers or tanks.
We recommend running at least a hybrid dps priest with 3 dps for maximum
rewards.
Move Set
Sync Rate
The more units in the same row that successfully collect Sython, the higher the Sync Rate is gained. Each 1% Sync Rate increases all units’ DMG by 1%. When the Sync Rate exceeds 100%, it will gradually decrease until it drops back to 100%.
Off-string Notes
Explodes when moved to the last row, dealing massive DMG to all units on the same grid.
Synthon - Blue
When moving to the last row, blue faction units in the same cell can collect and increase Sync Rate.
Synthon - Yellow
When moving to the last row, yellow faction units in the same cell can collect and increase Sync Rate.
A-T Field Shield
Deploys a 5-cell A.T. Field on a random cell, blocking Off-String Notes and Synthon on the field.
Charged Particle Cannon
Fires a Charged Particle Cannon along a random track, dealing massive DMG. Dodge Them!
Rewards
There are various rewards waiting for players that participate in this Event. The breakdown is as follows ; First-time Clear Shared Loot Rewards, Nerv’s Approval Milestones, and the Treasure Chests gained from dealing damage to the boss.
Shared Loot Rewards
This reward can only be claimed once per event, giving the player a total of 1000 Stellarite based on the highest cleared stage within the player’s CC and Level Bracket. This reward is granted to all players within that bracket and encourages players to be the first to clear high difficulty stages for bragging rights.
Nerv’s Approval Milestones
When players collect Fortification Supplies from clearing ‘Final
Echo’, the amount of Synthons (Buff Orbs) is tracked by the game,
and players are given special rewards based on the total amount the
player has received within the event’s duration.
Below is a list of rewards and costume pieces the players can claim by
reaching certain milestones.
Collect 18 Synthons - ‘Spear of Longinus’ Back Costume Piece
Collect 36 Synthons - 300 Stellarite
Collect 54 Synthons - ‘Safety Helmet’ Hood Costume Piece
Collect 90 Synthons - 300 Stellarite
| Reward | Chance |
|---|---|
| 500 Stellarite | 1% |
| 100 Stellarite | 1.5% |
| 20 Stellarite | 12% |
| 10 Stellarite | 30% |
| 100 Runes | 1.5% |
| 50 Runes | 4% |
| 10 Runes | 50% |
ECHOES OF BATTLEFIELD: THE 10th ANGEL
For a more in-depth guide for of Echoes of Battlefield: The 10th Angel, check out our guide below!
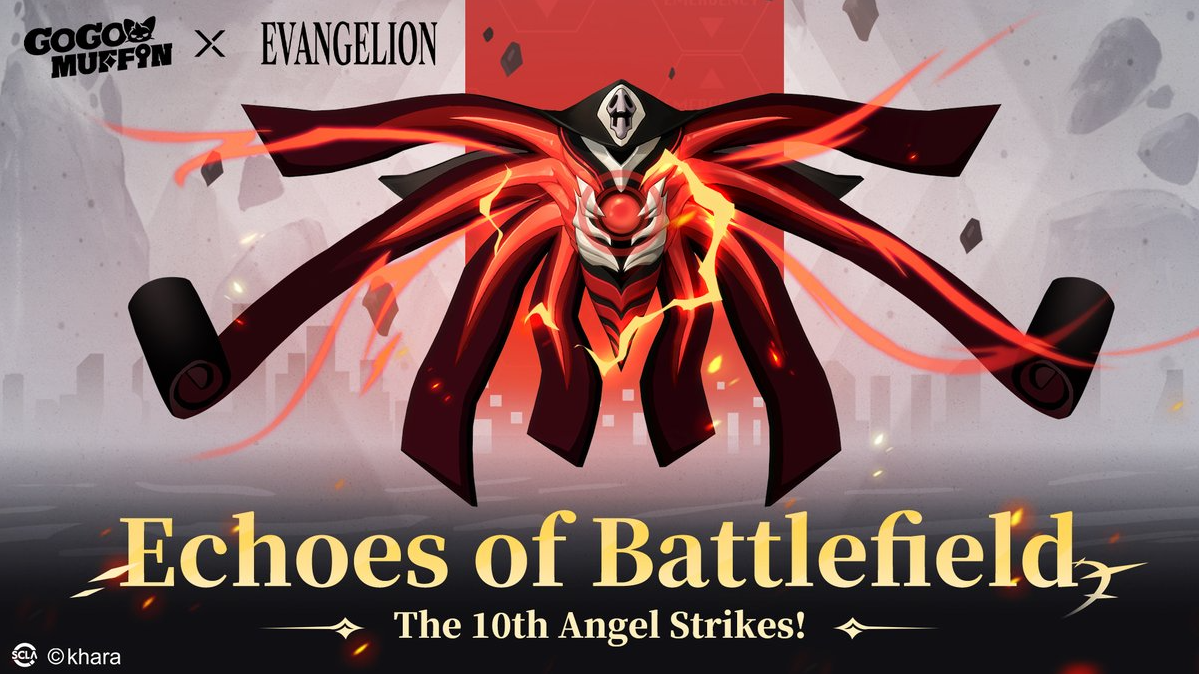
The 10th Angel (EOB) Guide
MODIFICATION PROGRAM EVENT
This event allows the players to repair the quantum tunnel and
receive rewards in exchange!
Players can obtain modification chips from claiming their daily chests,
up to 5 a day. Players will obtain 2 types of rewards within this event.
Players will receive a reward upon the submission of a modification chip,
and based on the total amount of modification chips that has been submitted
by the whole region.
Total Repair Progress Rewards
120000 Mod Chips Submitted - 300 Stellarite, 300 Pet Food
240000 Mod Chips Submitted- 5 Skill Summons, 25 Lucky Horseshoe
360000 Mod Chips Submitted - 5 Inspiration, 50 Cat Butter
480000 Mod Chips Submitted - ‘SDAT’ Tail Costume Piece, 10 Recharge Crystals
600000 Mod Chips Submitted - 500 Stellarite, 1 Imagined Reality
| Reward | Amount | Chance |
|---|---|---|
| Benevolent Beast Point Card | 10 | 0.01% |
| Myth Experience | 10 | 0.01% |
| Melomon Summoning Selection | 30 | 0.01% |
| Extreme Resonance Stone | 25 | 0.01% |
| Stellarite | 1500 | 0.06% |
| Modification Chip | 2 | 5.90% |
| Rune Character | 100 | 8% |
| Energy | 20 | 8.50% |
| Super Growth Snacks | 25 | 8.50% |
| Cat Sugar | 50 | 8.50% |
| Mount Saddle | 150 | 8.50% |
| Rare EXP | 15 | 8.50% |
| Basic Resonance Stone | 300 | 8.50% |
| Stellarite | 100 | 15% |
| Stellarite | 50 | 20% |
LUMINOUS ODYSSEY BATTLEPASS
Players can obtain progress within the battlepass by logging on
daily and acquiring glimmer points from the luminous odyssey battle
pass menu.
Below is a breakdown of the rewards the player will receive for the free,
paid, and combined paths.
Free Path
Level 1 - 150 Stellarite
Level 2 - 1 Legendary EXP
Level 3 - 5 Advanced Resonance Stones
Level 4 - 1 Melomon Summoning Selection
Level 5 - EVA Sticker Set No.2
Level 6 - Star Skill Selection Pack
Level 7 - Benevolent Beast Point Card
Free Total:
150 Stellarite, 1 Legendary EXP, 5 Advanced Resonance Stones, 1 Melomon
Summoning Selection, EVA Sticker Set No.2, Star Skill Selection Pack,
Benevolent Beast Point Card
Paid Path
Level 1 - 680 Stellarite, 600 Pet Food
Level 2 - 1 Imagined Reality , 100000 Raw Material
Level 3 - 5 Extreme Resonance Stone, 80 Super Growth Snacks
Level 4 - 5 Melomon Summoning Selection, 500 Mount Saddle
Level 5 - 10 Mount Selection Ticket Pack, 1000 Star EXP
Level 6 - 5 Star Skill Selection Pack, 500 Cat Sugar
Level 7 - 1 Benevolent Beast Point Card, 300 Stellarite
Paid Path Total:
980 Stellarite, 600 Pet Food, 1 Imagined Reality , 100000 Raw Material,
5 Extreme Resonance Stone, 80 Super Growth Snacks, 5 Melomon Summoning
Selection, 500 Mount Saddle, 10 Mount Selection Ticket Pack, 1000 Star
EXP, 5 Star Skill Selection Pack, 500 Cat Sugar, 1 Benevolent Beast Point
Card
Both Total Reorganized
EVA Sticker Set No.2
1130 Stellarite
1 Legendary EXP, 1 Imagined Reality
5 Advanced Resonance Stones, 5 Extreme Resonance Stones
6 Melomon Summoning Selection, 600 Pet Food, 80 Super Growth Snacks
2 Benevolent Beast Point Card, 10 Mount Selection Ticket Pack, 500 Mount
Saddle
6 Star Skill Selection Pack, 1000 Star EXP
100000 Raw Material, 500 Cat Sugar
Purchasing Recommendation
We do not recommend buying this battle pass as its rewards are
lackluster when compared to other options.
Slight Spenders should avoid, although there is merit in buying it due
to the limited Benevolent Beast Point Cards Available within its reward
pool. It is a decent purchase for those that have excess disposable income.
Copyright @ 2025 Boarhat.gg